Here’s How Javascript Classes Can Help
Imagine that you’re building a web application that requires you to manage a lot of data. Let’s say you’re building a social media platform, and you need to keep track of user profiles, posts, comments, likes, and more. You could have dozens, hundreds, or even thousands of different data points that you need to keep track of. That’s where JavaScript classes come in.
JavaScript classes are a powerful tool for developers that can help you write cleaner, more efficient code. Classes allow you to create reusable code templates that you can use to create new objects with similar properties and behaviors. This means you don’t have to write out the same code over and over again, saving you time and reducing the chances of errors creeping into your code.
If you’re not familiar with JavaScript classes or haven’t used them before, don’t worry. By the end of this article, you’ll have the knowledge to write better, more efficient code. So, let’s dive into the world of JavaScript classes and discover the power they hold!
Does javascript have classes?
Yes, JavaScript has classes. Although JavaScript is primarily a prototype-based language, it also supports class-based inheritance through the ES6 (ECMAScript 2015) specification. This means that developers can use classes to create objects that have similar properties and behaviors. Classes in JavaScript provide a way to create reusable code templates and instances of those templates, making it easier to organize and maintain complex codebases.
Now that we know that JavaScript does have classes, let’s explore in more detail what JavaScript classes are and how they work.
What are JavaScript Classes?
Classes in JavaScript are a type of object-oriented programming (OOP) construct that allow you to define blueprints for objects with a similar structure and behavior. A class describes the properties and methods that objects of that class will have. You can think of a class as a template or a blueprint for creating objects.
When you create an object using a class, you create an instance of that class. Each class instance has its properties and methods, but they share the same structure and behavior defined in the class. This makes creating and working with objects with similar properties and methods easier.
In JavaScript, classes are created using the class keyword. We define a class by creating a constructor function and adding properties and methods to its prototype. The constructor function is called when a new instance of the class is created using the new keyword.
Here’s an example of a simple JavaScript class:
class Person {
  constructor(name, age) {
    this.name = name;
    this.age = age;
  }

  sayHello() {
    console.log(`Hello, my name is ${this.name} and I'm ${this.age} years old.`);
  }
}
In this example, we define a Person class with two properties (name and age) and a sayHello method that logs a greeting to the console. We can create a new instance of the Person class like this:
const person = new Person('Alice', 30);
person.sayHello(); // logs "Hello, my name is Alice and I'm 30 years old."
JavaScript classes provide a way to define a blueprint for creating objects with similar structure and behavior. They make creating and working with objects easier by organizing them into classes with shared properties and methods. Now let’s see how to use them.
First, watch this video for a quick 4 minute introduction to Javascript classes:
What are the classes in Javascript?
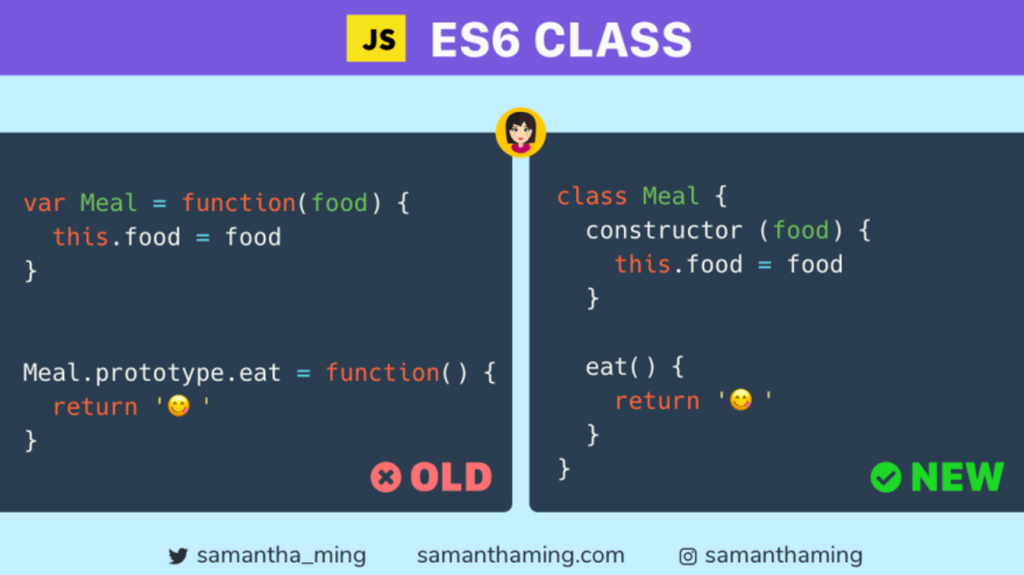
In JavaScript, there are several types of classes that you can use, each with its own syntax and benefits. These include:
- Constructor: A function used to create and initialize objects. The syntax for a constructor class is
function ClassName() { ... }. Constructor classes are prototype-based, meaning that you can add methods to them using theprototypekeyword. - Prototype: An object that acts as a blueprint for creating other objects. The syntax for a prototype class is
ClassName.prototype.methodName = function() { ... };. Like constructor classes, prototype classes are also prototype-based. - Factory: A function that returns an object. The syntax for a factory class is
function createClassName() { return { ... }; }. Unlike constructor and prototype classes, factory classes use object composition rather than inheritance. - Singleton: A class that is only instantiated once. The syntax for a singleton class is
const instance = new ClassName();. Singleton classes don’t use inheritance, but rather rely on a single instance of the class. - Mixin: A way to add functionality to an object without inheritance. The syntax for a mixin is
const objectWithMixin = Object.assign({}, mixinObject);. Mixins add functionality to an existing object without modifying its prototype. - ES6 class: A syntactical sugar for constructor and prototype-based classes. The syntax for an ES6 class is
class ClassName { constructor() { ... } methodName() { ... } }. ES6 classes are also prototype-based, but they use theextendskeyword for inheritance and also have the ability to define private fields.
Classes Table
Here’s an overview of each class and their capabilities:
| Class Type | Definition | Syntax | Inheritance | Private Fields |
|---|---|---|---|---|
| Constructor | A function used to create and initialize objects | function ClassName() { ... } | Prototype-based | No |
| Prototype | An object that acts as a blueprint for creating other objects | ClassName.prototype.methodName = function() { ... }; | Prototype-based | No |
| Factory | A function that returns an object | function createClassName() { return { ... }; } | Object composition | No |
| Singleton | A class that can only be instantiated once | const instance = new ClassName(); | None | No |
| Mixin | A way to add functionality to an object without inheritance | const objectWithMixin = Object.assign({}, mixinObject); | None | No |
| ES6 class | A syntactical sugar for constructor and prototype-based classes | class ClassName { constructor() { ... } methodName() { ... } } | Prototype-based, extends() | Yes |
Note that while private fields are only available in ES6 classes, they are simulated in other classes using various techniques. So what’s make an ES6 class special?
What is an ES6 class?
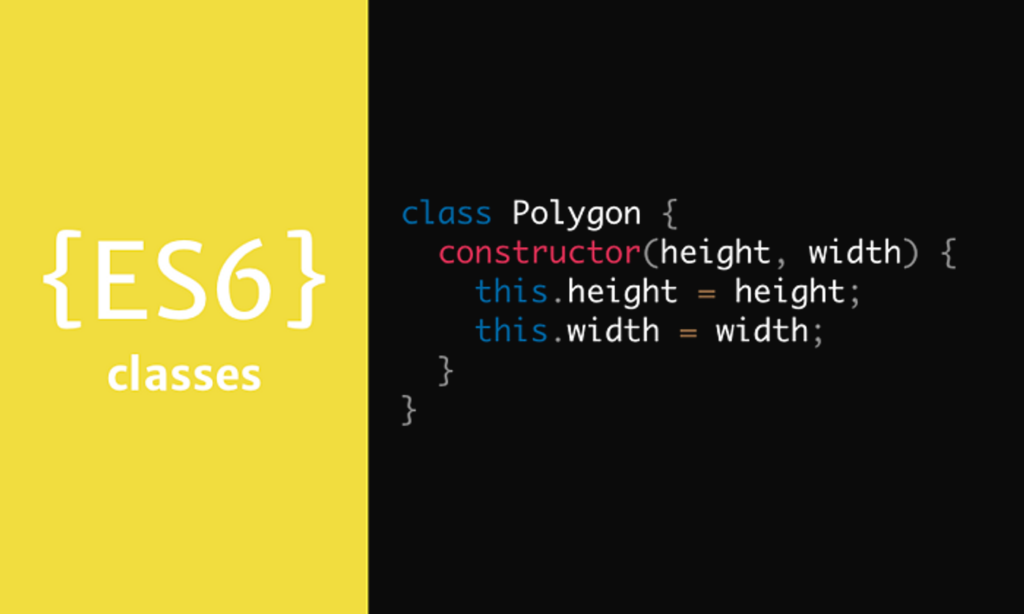
ES6 class is a syntactical sugar for creating objects with a class-like syntax in JavaScript. It is a way to define a blueprint for creating objects, similar to how classes work in other programming languages.
Under the hood, ES6 classes are still based on JavaScript’s prototype-based inheritance model. The class syntax provides a more concise and familiar way of defining objects and inheritance relationships.
Here’s an example of defining a simple class using the ES6 class syntax:
class Person {
  constructor(name, age) {
    this.name = name;
    this.age = age;
  }

  sayHello() {
    console.log(`Hello, my name is ${this.name} and I am ${this.age} years old.`);
  }
}
In this example, we define a Person class using the class keyword. The class has a constructor function that takes in two parameters, name and age.
Inside the constructor function, we use the this keyword to define two properties, name and age, on the object that will be created from this class. These properties will be unique to each object created from the class.
We also define a sayHello() method on the class using a regular function syntax. The sayHello() method logs a message to the console that includes the name and age properties of the object.
Using this class, we can create new instances of Person objects:
const person1 = new Person('Alice', 25);
const person2 = new Person('Bob', 30);

person1.sayHello(); // logs "Hello, my name is Alice and I am 25 years old."
person2.sayHello(); // logs "Hello, my name is Bob and I am 30 years old."
In this example, we create two new instances of Person objects, person1 and person2, with different name and age properties. We call the sayHello() method on each object to log a message to the console.
ES6 classes provide a more familiar and concise syntax for defining objects and inheritance relationships in JavaScript. They are a powerful tool for creating reusable and modular code.
What makes ES6 different?
ES6 classes in JavaScript are different than classes in other programming languages in several ways:
- Prototype-based inheritance: ES6 classes are based on JavaScript’s prototype-based inheritance model, where objects inherit properties and methods from their prototypes.
- Syntactic sugar: ES6 classes provide a more concise and familiar syntax for defining objects and inheritance relationships in JavaScript. They are a syntactic sugar on top of JavaScript’s existing prototype-based inheritance model.
- Dynamic nature: JavaScript objects are dynamic and can have properties added or removed at runtime. This also applies to objects created from ES6 classes.
- No hoisting: Unlike function declarations, ES6 class declarations are not hoisted and must be declared before used.
Overall, ES6 classes provide a simpler and more intuitive syntax for creating objects and inheritance relationships in JavaScript, while still being based on JavaScript’s underlying prototype-based inheritance model.
How to use classes in javascript
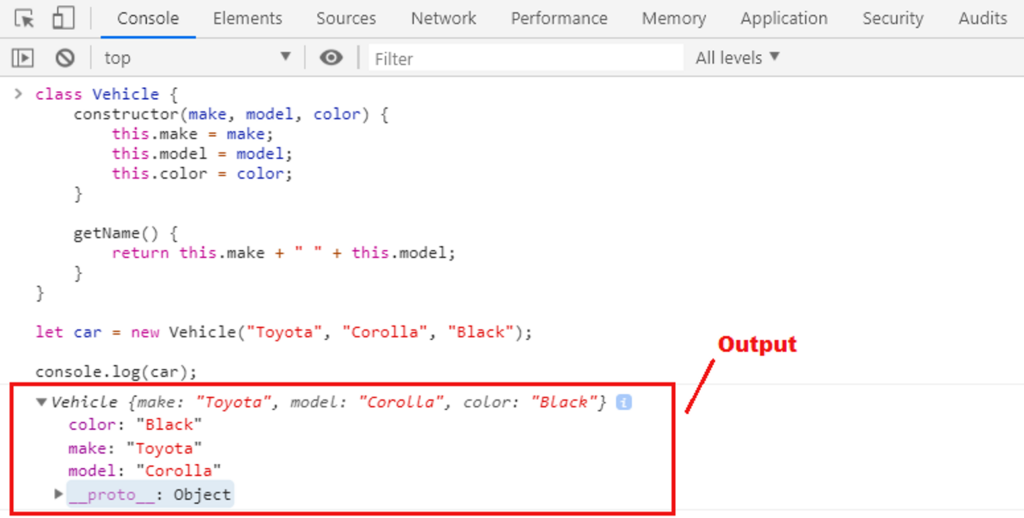
Creating a new instance of a JavaScript class is easy. To use a class in JavaScript, you need to follow a few steps:
- Define the class: Use the
classkeyword followed by the name of the class to define a class. The class should have a constructor function that sets up the object’s initial state. Inside the class, you can define properties and methods, which can be accessed using thethiskeyword.
class Animal {
  constructor(name, age) {
    this.name = name;
    this.age = age;
  }
}
In this example, we define a Animal class that has a constructor function that sets the name and age properties of the object.
- Create an instance of the class: Use the
newkeyword to create a new instance of the class. Pass any necessary arguments to the constructor function.
const myAnimal = new Animal('Fluffy', 2);
In this example, we create a new instance of the Animal class and pass in the necessary arguments to its constructor function.
- Access properties and methods: Use dot notation to access the properties and methods of the object.
console.log(myAnimal.name); // logs "Fluffy"
console.log(myAnimal.age); // logs 2
In this example, we access the name and age properties of the myAnimal object using dot notation.
Subclass example
Here’s an example of using a subclass:
- Define the subclass: Use the
classkeyword to define a subclass. The subclass should extend the parent class and have a constructor function that sets up the initial state of the object.
class Dog extends Animal {
  constructor(name, age, breed) {
    super(name, age);
    this.breed = breed;
  }

  speak() {
    console.log('The dog barks');
  }
}
In this example, we define a Dog subclass that extends the Animal parent class. The Dog class has a constructor function that sets the object’s name, age, and breed properties, and a speak method that logs a message to the console.
- Create an instance of the subclass: Use the
newkeyword to create a new instance of the subclass. Pass any necessary arguments to the constructor function.
const myDog = new Dog('Fido', 3, 'Labrador');
In this example, we create a new instance of the Dog subclass and pass in the necessary arguments to its constructor function.
- Access properties and methods: Use dot notation to access the properties and methods of the object.
console.log(myDog.name); // logs "Fido"
console.log(myDog.age); // logs 3
console.log(myDog.breed); // logs "Labrador"
myDog.speak(); // logs "The dog barks"
In this example, we access the name, age, and breed properties of the myDog object using dot notation, and we call the speak method to log a message to the console.
Here’s what the code looks like altogether:
class Animal {
  constructor(name, age) {
    this.name = name;
    this.age = age;
  }

  speak() {
    console.log('The animal makes a sound');
  }
}

class Dog extends Animal {
  constructor(name, age, breed) {
    super(name, age);
    this.breed = breed;
  }

  speak() {
    console.log('The dog barks');
  }
}

const myDog = new Dog('Fido', 3, 'Labrador');
console.log(myDog.name); // logs "Fido"
console.log(myDog.age); // logs 3
console.log(myDog.breed); // logs "Labrador"
myDog.speak(); // logs "The dog barks"
Advanced JavaScript Class Concepts
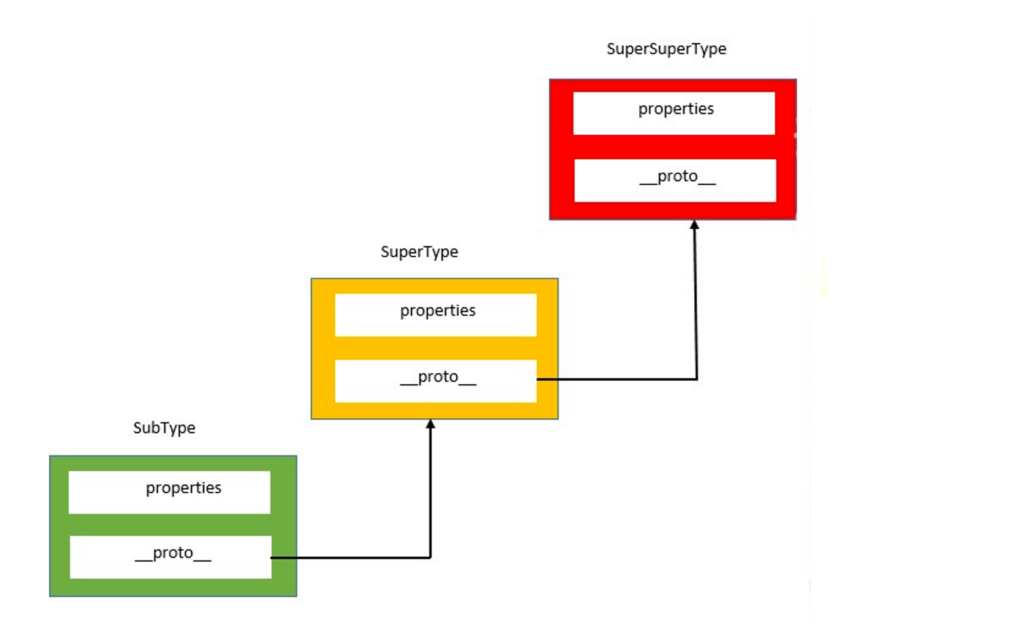
There are several advanced concepts associated with JavaScript classes that can help you write more powerful and maintainable code. Here are a few of the most important concepts:
Inheritance
Inheritance is a mechanism that allows you to create a new class that is a modified version of an existing class. The new class inherits all of the properties and methods of the current class and can also define its properties and methods. Inheritance can help you create more modular and reusable code.
Here’s an example of using inheritance in JavaScript classes:
class Animal {
  constructor(name) {
    this.name = name;
  }

  speak() {
    console.log(`${this.name} makes a noise.`);
  }
}

class Dog extends Animal {
  speak() {
    console.log(`${this.name} barks.`);
  }
}

const dog = new Dog("Rex");
dog.speak(); // Rex barks.
In this example, we define an Animal class with a speak method. We then define a Dog class that extends the Animal class and overrides the speak method with its own implementation. Finally, we create a new instance of the Dog class and call its speak method.
Polymorphism
Polymorphism is the concept of using a single interface to represent multiple types of objects. Different objects can be used interchangeably if they implement the same interface or have the same method names. In object-oriented programming, we can achieve polymorphism through inheritance and method overriding.
In JavaScript, we can achieve polymorphism through method overriding. Method overriding occurs when a subclass provides its implementation of a technique defined in its parent class. The subclass can then use this method instead of the one in the parent class. Here’s an example of polymorphism in JavaScript:
class Shape {
  constructor(name) {
    this.name = name;
  }

  getArea() {
    console.log(`Calculating area of ${this.name}`);
  }
}

class Circle extends Shape {
  constructor(radius) {
    super('circle');
    this.radius = radius;
  }

  getArea() {
    super.getArea();
    console.log(`Area of circle: ${Math.PI * this.radius ** 2}`);
  }
}

class Rectangle extends Shape {
  constructor(width, height) {
    super('rectangle');
    this.width = width;
    this.height = height;
  }

  getArea() {
    super.getArea();
    console.log(`Area of rectangle: ${this.width * this.height}`);
  }
}

const circle = new Circle(5);
circle.getArea(); // Output: Calculating area of circle, Area of circle: 78.53981633974483

const rectangle = new Rectangle(10, 5);
rectangle.getArea(); // Output: Calculating area of rectangle, Area of rectangle: 50
In this example, we have a parent class Shape with a getArea method. The Circle and Rectangle classes extend Shape and provide their own implementation of getArea. When we call the getArea method on instances of Circle and Rectangle, their respective implementation of getArea is invoked. This allows us to use both Circle and Rectangle objects interchangeably, as long as they have the getArea method.
Abstract Classes
An abstract class is a class that cannot be instantiated directly but must be subclassed. It is used as a base class for other classes to inherit from, but more is needed to provide a complete implementation. Abstract classes define abstract methods, which do not have an implementation in the abstract class but must be implemented in the subclass.
In JavaScript, we can create abstract classes using the throw keyword to throw an error if an abstract method is called. This ensures that the abstract method is implemented in the subclass.
Here’s an example of an abstract class in JavaScript:
class Shape {
  constructor(name) {
    this.name = name;
  }

  getArea() {
    throw new Error('Abstract method not implemented');
  }
}

class Circle extends Shape {
  constructor(radius) {
    super('circle');
    this.radius = radius;
  }

  getArea() {
    return Math.PI * this.radius ** 2;
  }
}

const circle = new Circle(5);
console.log(circle.getArea()); // Output: 78.53981633974483

const shape = new Shape('shape');
console.log(shape.getArea()); // Output: Uncaught Error: Abstract method not implemented
In this example, Shape is an abstract class that defines the getArea method as an abstract method. When we try to create an instance of Shape and call the getArea method, an error is thrown because getArea is an abstract method and has not been implemented in the Shape class.
The Circle class extends Shape and provides its own implementation of getArea. When we create an instance of Circle and call the getArea method, the implementation in the Circle class is called instead of the abstract implementation in the Shape class.
Interfaces
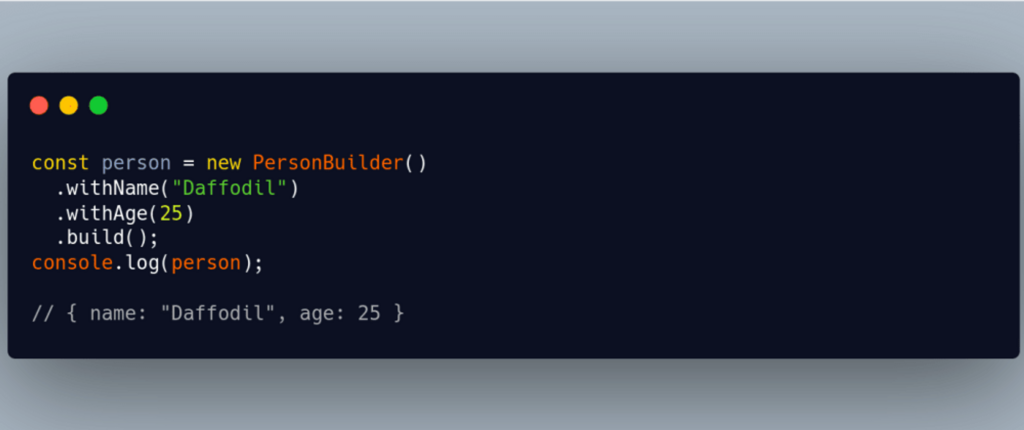
Interfaces are a way to define a contract for classes or objects, specifying the methods and properties that they must implement. In other words, interfaces define a set of rules that classes or objects must follow to be considered compatible with the interface. Interfaces can be used to achieve polymorphism, where different objects can be used interchangeably as long as they implement the same interface. Interfaces are not natively supported in JavaScript, but we can simulate them using a combination of classes and duck typing. Duck typing is a programming concept that allows an object to be used as long as it has the necessary properties and methods, regardless of its actual type.
Here’s an example of an interface in JavaScript:
class Shape {
  constructor(name) {
    this.name = name;
  }

  getArea() {
    console.log(`Calculating area of ${this.name}`);
  }
}

class Circle extends Shape {
  constructor(radius) {
    super('circle');
    this.radius = radius;
  }

  getArea() {
    console.log(`Area of circle: ${Math.PI * this.radius ** 2}`);
  }
}

class Rectangle extends Shape {
  constructor(width, height) {
    super('rectangle');
    this.width = width;
    this.height = height;
  }

  getArea() {
    console.log(`Area of rectangle: ${this.width * this.height}`);
  }
}

function calculateArea(shape) {
  if (typeof shape.getArea !== 'function') {
    throw new Error('Shape does not implement the getArea method');
  }

  shape.getArea();
}

const circle = new Circle(5);
calculateArea(circle); // Output: Area of circle: 78.53981633974483

const rectangle = new Rectangle(10, 5);
calculateArea(rectangle); // Output: Area of rectangle: 50

const square = { name: 'square', getArea() { console.log('Area of square: 25'); } };
calculateArea(square); // Output: Area of square: 25

const invalidShape = { name: 'invalid shape' };
calculateArea(invalidShape); // Output: Uncaught Error: Shape does not implement the getArea method
In this example, we have a Shape class with a getArea method. The Circle and Rectangle classes extend Shape and provide their own implementation of getArea.
We also have a calculateArea function that takes a shape parameter. The function checks if the shape parameter has a getArea method using duck typing. If the shape parameter does not have a getArea method, an error is thrown.
We can use the calculateArea function to calculate the area of different shapes, including a square object that does not belong to any class but has the necessary properties and methods to be considered compatible with the Shape interface.
Static Methods
Static methods belong to the class itself rather than to class instances, and this means that we can call a static method on the class itself rather than on an instance. Static methods are helpful for utility functions or methods that don’t depend on the instance’s state. They can be used to perform operations unrelated to the instance, such as creating new instances or performing calculations.
In JavaScript, we can define static methods using the static keyword. Static methods can be called using the class name, followed by the method name, without the need to create an instance of the class.
Here’s an example of a static method in JavaScript:
class MathUtils {
  static add(a, b) {
    return a + b;
  }

  static subtract(a, b) {
    return a - b;
  }
}

console.log(MathUtils.add(1, 2)); // Output: 3
console.log(MathUtils.subtract(5, 3)); // Output: 2
In this example, we have a MathUtils class with two static methods, add and subtract. We can call these methods using the class name, without the need to create an instance of the class.
Static methods can also be called from within the class using the this keyword, followed by the class name. Here’s an example:
class MathUtils {
  static add(a, b) {
    return this.className() + ': ' + (a + b);
  }

  static subtract(a, b) {
    return this.className() + ': ' + (a - b);
  }

  static className() {
    return 'MathUtils';
  }
}

console.log(MathUtils.add(1, 2)); // Output: MathUtils: 3
console.log(MathUtils.subtract(5, 3)); // Output: MathUtils: 2
In this example, the add and subtract methods call a className static method to get the class name, and include it in the result. The className method is also a static method and uses the this keyword to refer to the class itself.
Private Fields
Private fields are a recent addition to the JavaScript language and provide a way to define private properties on a class. Private fields are denoted by a # symbol before the field name, and they cannot be accessed from outside the class.
Here’s an example of defining a private field:
class Person {
  #name;

  constructor(name) {
    this.#name = name;
  }
}
In this example, we define a Person class with a private #name field. The field is initialized in the constructor function and inaccessible from outside the class.
Here are some key points to keep in mind when working with private fields:
- Private fields are only accessible within the class that defines them. They cannot be accessed from outside the class, even by methods or properties defined on the class.
- Private fields are unique to each instance of the class. Each object has its own private field; changes to one object’s private field will not affect other objects.
- Private fields can be used in conjunction with methods to create private methods. Private methods can only be called from within the class and are not accessible outside the class.
Here’s an example of using a private field in a method:
class Person {
  #name;

  constructor(name) {
    this.#name = name;
  }

  getName() {
    return this.#name;
  }
}
In this example, we define a getName() method that returns the value of the private #name field. Because the #name field is private, it can only be accessed from within the class.
Private fields are a powerful tool for encapsulating data within a class and preventing external access to that data. They provide a way to define private properties that are inaccessible from outside the class and can be used in combination with methods to create private methods.
Because of its complicated nature, here’s a video to solidify the information:
Getters and Setters

Getters and setters are special methods in JavaScript that allow us to get and set the values of an object’s properties. Getters are used to get the value of a property, while setters are used to set the value of a property.
Getters and setters can be useful for controlling access to an object’s properties, and for performing validation or other operations when getting or setting the property value.
In JavaScript, we can define getters and setters using the get and set keywords. The get keyword is used to define a getter method, while the set keyword is used to define a setter method.
Here’s an example of a getter and a setter in JavaScript:
class Person {
  constructor(firstName, lastName) {
    this.firstName = firstName;
    this.lastName = lastName;
  }

  get fullName() {
    return this.firstName + ' ' + this.lastName;
  }

  set fullName(name) {
    const parts = name.split(' ');
    this.firstName = parts[0];
    this.lastName = parts[1];
  }
}

const person = new Person('John', 'Doe');
console.log(person.fullName); // Output: John Doe

person.fullName = 'Jane Doe';
console.log(person.firstName); // Output: Jane
console.log(person.lastName); // Output: Doe
In this example, we have a Person class with a fullName getter and setter. The fullName getter returns the person’s full name, which is constructed by concatenating the firstName and lastName properties. The fullName setter sets the firstName and lastName properties based on the provided full name.
We can use the fullName getter and setter to get and set a person’s full name, which will automatically update the firstName and lastName properties.
Getters and setters can also perform validation or other operations when getting or setting the property value. For example, we could add validation to the fullName setter to ensure the provided full name is valid.
Mixins
Mixins are a way to add functionality to a class without creating a new subclass. Mixins are essentially just objects with methods that can be mixed into a class using inheritance. A mixin is a class that contains methods that can be added to other classes. To apply a mixin to a class, you use the Object.assign() method.
- Create a mixin object that contains the methods you want to add to your class:
const swimMixin = {
  swim() {
    console.log(`${this.name} is swimming`);
  }
};
In this example, we define a swimMixin object that has a swim method.
- Inherit from the mixin object in your class definition using
Object.assign():
class Fish {
  constructor(name) {
    this.name = name;
  }
}

Object.assign(Fish.prototype, swimMixin);
Then, we define a Fish class with a constructor function that sets the object’s name property. We then use the Object.assign() method to mix in the swimMixin object into the Fish prototype.
- Create an instance of the class and call the mixed-in method:
javascriptCopy code
const nemo = new Fish('Nemo');
nemo.swim(); // logs "Nemo is swimming"
We create a new instance of the Fish class and call the swim method, which logs a message to the console.
Mixins are a powerful tool that allows you to reuse code across different classes without having to create a new subclass for each variation.
Decorators
Decorators are a feature in JavaScript that allows us to modify a class’s behavior or a method at runtime. Decorators are functions that are applied to a class or a method. They can modify the class or the method in various ways, such as adding new functionality, modifying the behavior, or adding metadata. Decorators are a form of metaprogramming, which is the ability of a program to manipulate its code at runtime. Metaprogramming can be a powerful technique for building flexible and reusable software, and decorators are useful for metaprogramming in JavaScript.
In JavaScript, we can define decorators using the @ symbol followed by the decorator function name. Decorators can be applied to classes, methods, or properties and can take arguments to modify their behavior.
Here’s an example of a class decorator in JavaScript:
function classDecorator(target) {
  target.foo = 'bar';
}

@classDecorator
class MyClass {
  constructor() {
    console.log(MyClass.foo); // Output: bar
  }
}
In this example, we have a classDecorator function that takes a target parameter, which is the class that the decorator is applied to. The classDecorator function adds a foo property to the class.
We then apply the @classDecorator decorator to the MyClass class, which adds the foo property to the class. When we create an instance of the MyClass class, we can access the foo property as a static class property.
Decorators: Modifying behavior
Decorators can also be used to modify the behavior of methods. Here’s an example of a method decorator in JavaScript:
function methodDecorator(target, name, descriptor) {
  const originalMethod = descriptor.value;
  descriptor.value = function(...args) {
    console.log(`Calling method ${name} with arguments ${args}`);
    const result = originalMethod.apply(this, args);
    console.log(`Method ${name} returned ${result}`);
    return result;
  };
  return descriptor;
}

class MyClass {
  @methodDecorator
  myMethod(a, b) {
    return a + b;
  }
}

const obj = new MyClass();
console.log(obj.myMethod(2, 3)); // Output: Calling method myMethod with arguments 2,3
                                //         Method myMethod returned 5
                                //         5
In this example, we have a methodDecorator function that takes three parameters: target, which is the class that the method belongs to, name, which is the name of the method, and descriptor, which is an object that describes the method.
The methodDecorator function modifies the behavior of the method by wrapping it with a logging function that logs the method name and arguments before and after the method is called.
We then apply the @methodDecorator decorator to the myMethod method of the MyClass class, which modifies the behavior of the method to include logging. When we call the myMethod method, we can also see the logging output in the console.
Advanced Concepts Table
For easy recall, here’s a table with summaries of all the advanced concepts:
| Concept | Description |
|---|---|
| Inheritance | A way for classes to inherit properties and methods from a parent class. In JavaScript, inheritance is achieved using the extends keyword. |
| Polymorphism | The ability for objects of different classes to be used interchangeably. In JavaScript, you can achieve polymorphism through inheritance and method overriding. |
| Abstract Classes | Classes that cannot be instantiated on their own, but serve as a base for other classes. In JavaScript, abstract classes can be created using the throw new Error() statement in a constructor or method that needs to be overridden. |
| Interfaces | A way to define a contract that a class must implement. In JavaScript, interfaces are not a built-in feature, but you can achieve something similar using object literals or TypeScript. |
| Static Methods | Methods that are called on the class itself, rather than on an instance of the class. In JavaScript, static methods can be defined using the static keyword. |
| Private Fields | Properties that are only accessible within the class they are defined in. In JavaScript, private fields can be defined using the # prefix. |
| Getters and Setters | Methods that allow you to get or set the values of a class property, while controlling access to the property. In JavaScript, getters and setters can be defined using the get and set keywords. |
| Mixins | A way to add functionality to a class by “mixing in” methods or properties from other objects. In JavaScript, you can achieve mixins using object composition or by using a third-party library like lodash or mixin-deep. |
| Decorators | A way to modify the behavior of a class or its members using annotations. In JavaScript, decorators are not a built-in feature, but you can use third-party libraries like core-decorators or @babel/plugin-proposal-decorators. |
Common Mistakes and Best Practices with JavaScript Classes
While JavaScript classes can be very useful, they can also be misused and lead to code that is difficult to maintain. Here are some common mistakes to avoid when working with classes:
- Not using
strictmode: Always use strict mode in your JavaScript code, especially when working with classes. This helps catch common errors and enforces best practices. - Creating too many classes: Don’t create classes just for the sake of it. Only create a class when it makes sense and provides clear benefits in terms of organization and reusability.
- Overcomplicating class hierarchies: Avoid creating overly complex class hierarchies with too many levels of inheritance. This can make it difficult to understand the relationships between classes and can lead to hard-to-maintain code.
- Not using constructor functions properly: Make sure to use the constructor function to initialize all necessary properties, and avoid adding unnecessary logic in the constructor.
- Not following naming conventions: Use descriptive names for classes, properties, and methods. This makes it easier for others to understand your code and helps with maintenance.
Are classes in JavaScript worth it?
Advantages of using classes in JavaScript:
- Simplicity and Readability: Classes provide a cleaner and more organized way to write code, making it easier to read and understand.
- Code Reusability: Classes can be reused throughout your codebase, reducing the amount of code duplication and making your codebase more modular.
- Encapsulation: Classes enable encapsulation, a fundamental object-oriented programming concept, by providing the ability to hide implementation details and expose only the necessary functionality.
- Inheritance: Classes also support inheritance, allowing you to create new classes based on existing ones and extend or override their behavior. This can be particularly useful when dealing with complex data structures or creating similar objects with common functionality.
Why not use classes in JavaScript?
Disadvantages of using classes in JavaScript:
- Potential for Overengineering: The use of classes can sometimes lead to overengineering and unnecessary complexity, mainly when dealing with simple data structures or small applications.
- Not Suitable for All Situations: While classes can be useful in many situations, they are not always the best solution. For example, functional programming techniques may be more appropriate when working with certain data types or complex control flow.
- Performance Overhead: The use of classes can sometimes lead to performance overhead, mainly when working with large numbers of objects. In some cases, alternative approaches, such as factory functions or prototypes, may be more efficient.
- Misuse and Abstraction: Finally, using classes can sometimes lead to abuse and over-abstraction, particularly when developers are not familiar with object-oriented programming concepts or try to force a class-based approach into situations where it is not appropriate.
JavaScript classes are an essential feature that provides an efficient and organized way to create objects and define their properties and methods. Classes can help you write clean, reusable, and maintainable code. You can also achieve more complex and robust solutions by leveraging advanced concepts like inheritance, polymorphism, and encapsulation. However, remember that classes are just one tool in your programming toolbox. This is the first step to writing more robust and efficient code and becoming a more effective developer.


