


3D animation is one of many ways that frontend development has evolved over time. They boost user interaction with your website and make it appear as if you’re engaging with real-world objects. This article will go through how to utilize three.js and the react-three-fiber library to implement 3D animation in your React application.
What is three.js?
Three.js is a cross-browser Javascript library that allows you to create and manipulate interactive 2D and 3D graphics animation in your browser using the HTML5 canvas API and WebGL API.
Canvas API is an HTML5 standard that allows the creation of 2D graphics, animation, data visualization, photo manipulation, and real-time video processing using the <canvas> HTML tag.
Because the Canvas API is mainly focused on 2D rendering, we have WebGL for 3D.
WebGL API stands for Web Graphics Library. It makes it possible to create high-performance interactive 2D and 3D graphics for the web.
What can you do with three.js?
Aside from animation, three.js may be used to create game graphics, as well as high-quality 3D react rendering and post-processing effects.

You can check out more three.js project examples here.
What is react-three-fiber?
react-three-fiber is an open-source react-renderer for three.js. It makes it easier to use three.js in React by exposing reusable and self-contained components from three.js.
Using react-three-fiber three.js renderer is one of the best practices for using three.js with React, as you can see the reusable and self-contained components.
Setting up our react-three-fiber project
Now that we know what three.js and react-three-fiber are. In this section, we’ll explore how to set up the fiber library in React and create a basic 3D component that participates in the render loop.
Step 1 – Creating a new react project
To demonstrate how 3D with react-three-fiber works in React, we’ll create a new react app named my-3d-react-app ****to experiment. This tutorial makes use of CRA (Create React App).
Create a new React my-3d-react-app application with the command below:
npx create-react-app my-3d-react-app
Navigate into the newly created my-3d-react-app ****directory:
cd my-3d-react-app
Next, start the React app server:
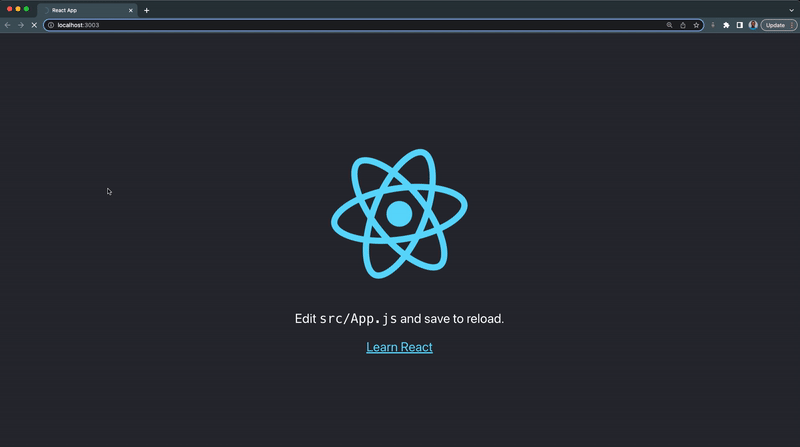
npm run start
Your React app will open a new tab on your browser and should look something like this:
Step 2 – Installing react-three-fiber
Run the command below to install react-three-fiber in your React application.
npm install three @react-three/fiber
Step 3 – Creating a 3D Cylinder with Mesh Geometry Component
To render objects to the scene, we’ll make a re-usable 3D component with mesh which is used to hold the geometry and the material needed to represent a shape in 3D space.
We’ll make a new mesh with a cylinderGeometry and a meshStandardMaterial that will attach to their parent automatically. You can learn how react-three-fiber attach objects to their parent here.
In your src folder:
- Create a new component folder
- Next, create a new Cylinder3d.jsx file inside the component folder
- Copy and paste the following code inside the Cylinder3d.jsx file:
import React, { useRef, useState } from "react";
import { useFrame } from "@react-three/fiber";

function Cylinder3d(props) {
  // This reference gives us direct access to the THREE.Mesh object
  const ref = useRef();
  // Hold state for hovered and clicked events
  const [hovered, hover] = useState(false);
  const [clicked, click] = useState(false);
  // Subscribe this component to the render-loop, rotate the mesh every frame
  useFrame((state, delta) => (ref.current.rotation.x += 0.01));
  // Return the view, these are regular Threejs elements expressed in JSX
  return (
    <mesh
      {...props}
      ref={ref}
      scale={clicked ? 1.5 : 1}
      onClick={(event) => click(!clicked)}
      onPointerOver={(event) => hover(true)}
      onPointerOut={(event) => hover(false)}
    >
      <cylinderGeometry args={[1, 1, 1]} />
      <meshStandardMaterial
        wireframe={props.wireframe}
        color={hovered ? "hotpink" : "orange"}
      />
    </mesh>
  );
}

export default Cylinder3d;
From the Cylinder3d component above:
- We import the useFrame hook from react fiber. This hook will allow us to create effects and control such as rotation.
- We also want to keep track of the hover state of the Cylinder3d component; we want the color to change from orange to hotpink on mouse hover.
- The mesh state reacts to user input and participates in events through the onClick, onPointerOver, and onPointerOut props.
- We also set the wireframe prop which expects either a true or false value.
Step 4 – Rendering the 3D Cylinder Component
Replace your App.js file with the code below:
import "./App.css";
import { Canvas } from "@react-three/fiber";
import Cylinder3d from "./component/Cylinder3d";

function App() {
  return (
    <>
      <section className='App-header'>
        <Canvas>
          {/* <pointLight position={[10, 10, 10]} /> */}
          {/* <ambientLight /> */}
          <Cylinder3d position={[-1.2, 0, 0]} />
          <Cylinder3d position={[1.2, 0, 0]} />
        </Canvas>
      </section>
    </>
  );
}

export default App;
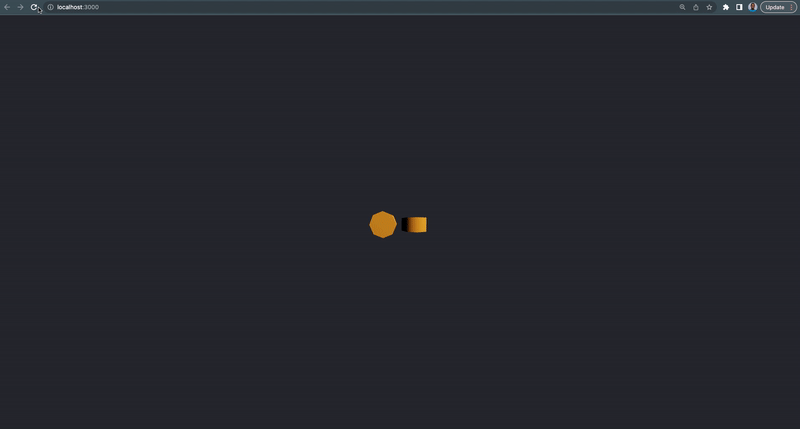
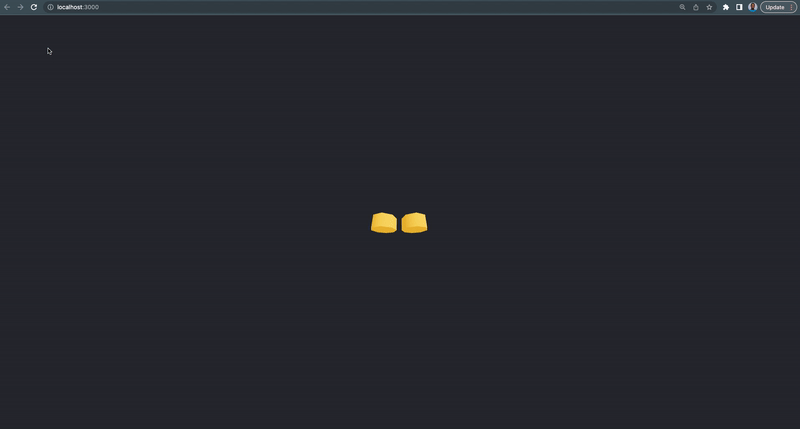
Our 3D Cylinder should look something like this:

Step 5 – Adding Lights to Scene
In this section, we’re going to add and see the effect of the pointLight and the ambientLight lights on the scene.
- Adding <pointLight/> to the scene
PointLight is a light that gets emitted from a single point in all directions.
Uncomment the following line within that <Canvas /> component in the App.js file:
<pointLight position={[10, 10, 10]} />
We use the position prop to define the direction of the light on the 3D cylinder.
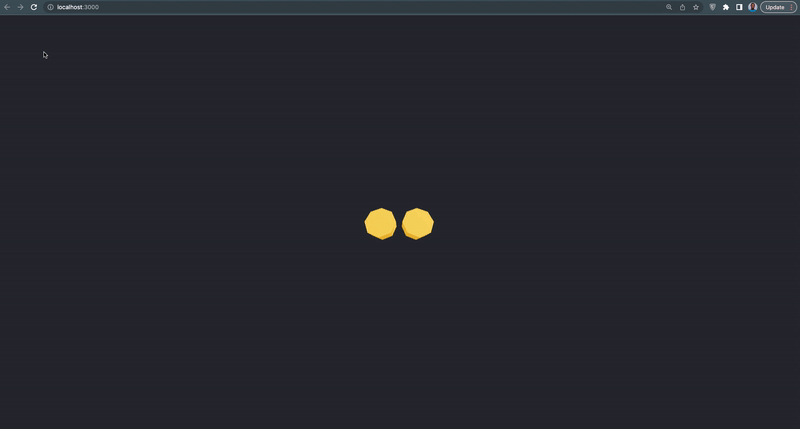
This will add light to our 3D cylinder as shown below:
- Adding <ambientLight/> to the scene
This light globally illuminates all objects in the scene equally and it does not have a direction.
Uncomment the <ambientLight /> within the <Canvas /> component in the App.js file:
<ambientLight />
The combination of the <pointLight/> and the <ambientLight/> will produce the following result:
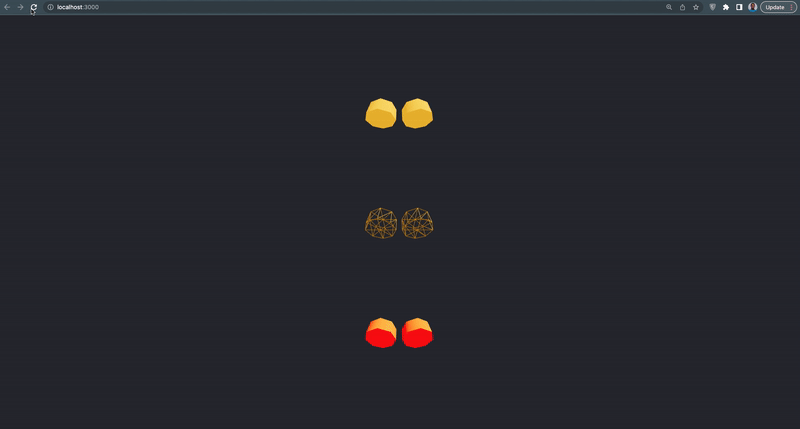
The hover and click state will look something like this:
Step 5 – Final Output
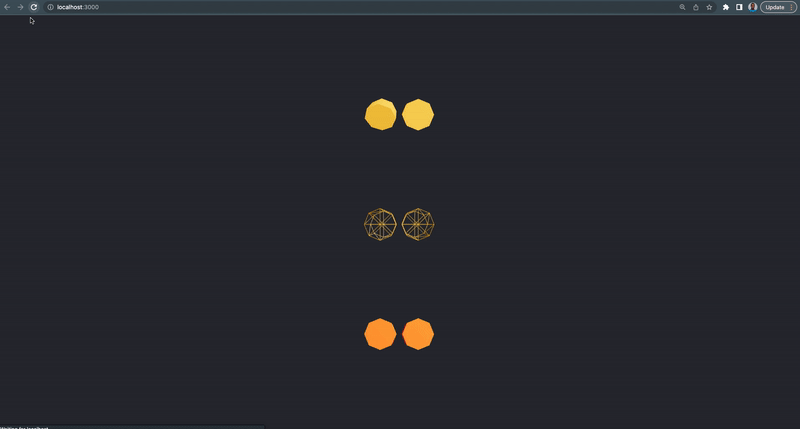
For the final demonstration, we’re going to render multiple versions of the 3D cylinder with different positions and props.
Update your App.js file with the code below:
import "./App.css";
import { Canvas } from "@react-three/fiber";
import Cylinder3d from "./component/Cylinder3d";

function App() {
  return (
    <>
      <section className='App-header'>
        {/* Canvas 1 */}
        <Canvas>
          <pointLight position={[10, 10, 10]} />
          <ambientLight />
          <Cylinder3d position={[-1.2, 0, 0]} />
          <Cylinder3d position={[1.2, 0, 0]} />
        </Canvas>

        {/* Canvas 2 */}
        <Canvas>
          <pointLight position={[10, 10, 10]} />
          <ambientLight intensity={0.5} />
          <Cylinder3d position={[-1.2, 0, 0]} wireframe={true} />
          <Cylinder3d position={[1.2, 0, 0]} wireframe={true} />
        </Canvas>

        {/* Canvas 3 */}
        <Canvas>
          <pointLight position={[10, 10, 10]} />
          <ambientLight color={"red"} />
          <Cylinder3d position={[-1.2, 0, 0]} />
          <Cylinder3d position={[1.2, 0, 0]} />
        </Canvas>
      </section>
    </>
  );
}

export default App;
From the above component:
In canvas 2
- We set an intensity prop of the ambientLight to 0.5.
- We set the wireframe prop to true which gives the cylinder an outline look.
In canvas 3
- We set the ambientLight color to red.
Our 3D cylinder final output should look something like this:
The hover and click state will look something like this:
react-three-fiber APIs, Hooks, and Events
The react fiber library has several APIs, Hooks, and Events that are not covered in this tutorial, you can check out the complete fiber documentation here.
Alternatives to three.js
If you want to explore more on 3D rendering, below are useful tools and alternatives to the three.js library:
Frequently asked questions
Does React three fiber work with react native?
Ans: Fiber is compatible with React v18. 0.0+ and works with ReactDOM and React Native. You can check the React Native installation guide here.
How does react-three-fiber work?
Ans: react-three-fiber is a three.js renderer, it enables you to use three.js declaratively with re-usable react 3D components. If you’re interested in learning the inner work of this library, check this guide.
Does three.js work with React?
Ans: Yes it does, but for best practice, you have to make use of react-three-fiber.
Wrapping Up
In this tutorial, we learned about three.js, and how to render it in React using the react-three-fiber library, an open source react renderer for three.js.
You can find the complete source code of this tutorial in this repository.
Where do you go next?
You can learn more about building projects with three.js and react-three-fiber from the videos below:
- three.js and react three fiber playlist tutorial:
- Learn how react-3-fiber works under the hood
If you’re looking out for cool React tools that’ll help you to write component code faster and be production ready faster than all the people in your competition, don’t forget to check out the CopyCat plugin for React!
Happy Coding!
Interesting Reads From Our Blogs
- Why and How to Use React useState Hook
- React UseRef: Create Scalable Apps That Perform Like a Dream
- Optimize Performance with Reactjs Build Production
Related Articles
-
 React.js
All You Need To Know About The Typescript Interface
Introduction A superset of JavaScript called TypeScript adds new functionality and useful enhancements to the language. This includes a potent static type system. By including types in your code, you can find or prevent mistakes early on and eliminate errors…
December 20, 2022 -
React.js
What to Read When Using React Typescript In Your App
Introduction These days, businesses are migrating their applications and digital product from plain ol' Javascript to Typescript. Why? Well, we could liken Typescript to Javascript with superpowers. How? We'll find out as we progress. Before we go into details, check…
October 1, 2022


