

- Introduction
- What is a CSS Class?
- Role of CSS Class in Styling
- Differences between CSS Classes, IDs, and Elements
- Is CSS a Class or Element?
- How do you type a class in CSS?
- Defining a Class in CSS
- Applying a Class to an HTML Element
- Using CSS Classes to Target Elements
- How to use CSS class in HTML
- Applying CSS classes to HTML elements
- Using CSS classes to style HTML elements
- What are the types of classes in CSS?
- Here’s how to Learn CSS Pseudo Elements In 8 Minutes:
- Tips for using CSS class selector effectively
- 7. Use descendant selectors and combinators:
- Using "CSS not class" selectors
- Elevate web design with CSS Class Selector
Introduction
Are you tired of feeling like your web designs aren’t quite hitting the mark? Look no further than CSS class selectors! These powerful tools allow you to target specific HTML elements and apply styles precisely and quickly. However, mastering CSS class selectors takes practice and know-how.
We’ll provide top tips and tricks for becoming a CSS class selector pro, so you can create professional-quality web designs that truly shine. From the basics of class selectors to advanced techniques for optimizing specificity and avoiding conflicts, we’ll cover everything you need to know to take your web design skills to the next level. So, whether you’re a beginner looking to get started with CSS class selectors or an experienced designer looking to level up your skills, read on to become a CSS class selector master!
We’ll provide top tips and tricks for becoming a CSS class selector pro, so you can create professional-quality web designs that truly shine. From the basics of class selectors to advanced techniques for optimizing specificity and avoiding conflicts, we’ll cover everything you need to know to take your web design skills to the next level. So, whether you’re a beginner looking to get started with CSS class selectors or an experienced designer looking to level up your skills, read on to become a CSS class selector master!
What is a CSS Class?
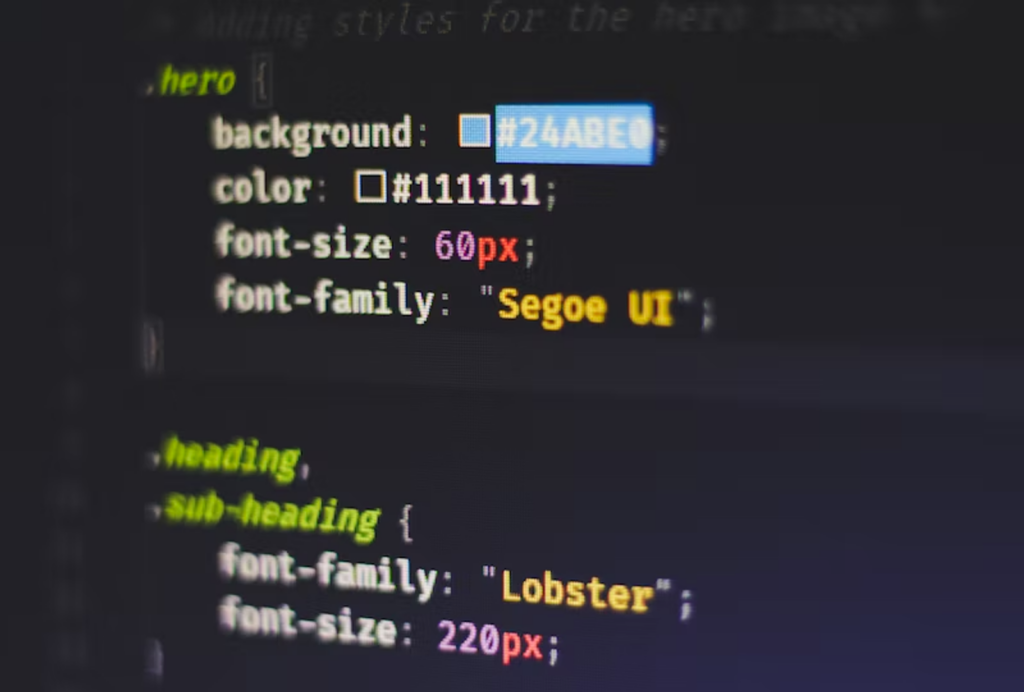
CSS classes are essential to web development, allowing designers and developers to apply styles to specific HTML elements on a web page. In CSS, a class is a way to collectively group HTML elements and apply styles to them. The class selector in CSS is denoted by a period (.), followed by the name of the class.
When creating a CSS class, you define a set of styles you want to apply to the elements with that class. Using the same class for multiple elements ensures they all receive the same styles, making it easy to create a cohesive design.
For example, let’s say you want to style all the headings on your website with a specific font, color, and size. You could create a class called “heading-style” in your CSS file and define the styles you want to apply to headings:
cssCopy code
.heading-style {
  font-family: Arial, sans-serif;
  color: #333;
  font-size: 2rem;
}
Then, in your HTML file, you could apply the “heading-style” class to all your headings by adding the class attribute to the HTML tag:
pythonCopy code
<h1 class="heading-style">This is a heading</h1>
<h2 class="heading-style">This is another heading</h2>
This would apply the styles you defined in the “heading-style” class to both the <h1> and <h2> elements, ensuring that they have a consistent look and feel.
CSS classes are also helpful in targeting specific elements within a larger structure. For example, you might have a section of your website that contains a list of articles, each with its title and summary. By applying a class to the title and summary elements, you can style them differently from the rest of the content on the page:
cssCopy code
.article-title {
  font-size: 2rem;
  color: #333;
}

.article-summary {
  font-size: 1.2rem;
  color: #666;
}
Then, in your HTML file, you could apply the “article-title” and “article-summary” classes to the appropriate elements within the article section:
phpCopy code
<div class="article">
  <h2 class="article-title">Article Title</h2>
  <p class="article-summary">This is a summary of the article.</p>
  <!-- more article content here -->
</div>
By using CSS classes in this way, you can easily style specific elements on your web page, create a consistent design, and improve the overall user experience.
Role of CSS Class in Styling

CSS classes play a crucial role in web page styling because they allow designers and developers to apply styles to specific HTML elements. Without CSS classes, it would be much more difficult and time-consuming to create a consistent design across multiple website pages or target specific elements for styling.
Here are some of the key roles of using CSS classes in styling:
- Consistent design: CSS classes help you create a consistent design across multiple pages on your website. By defining a set of styles in a class and applying that class to all relevant elements on your website, you can ensure they all have a consistent look and feel.
- Targeting specific elements: CSS classes are useful for targeting specific elements within a larger structure. By applying a class to the elements you want to style differently, you can make them stand out and help users navigate your site more easily.
- Efficient and maintainable code: CSS classes can help you write more efficient and maintainable CSS code. By defining a set of styles in a class, you can reuse that class throughout your website rather than having to write the same styles repeatedly for each element. This can save you time and effort and make it easier to update your styles.
- Override default styles: CSS classes allow you to override default styles provided by your website’s framework or other third-party libraries. This will enable you to create a unique design while benefiting from the convenience of using pre-made templates and frameworks.
Differences between CSS Classes, IDs, and Elements
CSS classes are just one type of selector that can be used in CSS. In several ways, they differ from other selectors, such as IDs and elements. While IDs uniquely identify a specific element on a page, classes can be applied to multiple elements. On the other hand, elements are used to target specific HTML elements, such as <p> or <h1>, without the need for additional identifiers. Here’s a table comparing the three highlighting their differences:
| CSS Class | ID | Element | |
| Definition | A name assigned to one or more HTML elements. | A unique identifier assigned to one HTML element. | A specific HTML tag, such as <p> or <h1>. |
| Syntax | Prefixed with a period (.) in CSS. | Prefixed with a pound sign (#) in CSS. | No prefix needed in CSS. |
| Applicability | Can be applied to multiple elements. | Can only be applied to one element. | Applies to all instances of the specific HTML tag. |
| Specificity | Less specific than IDs, but more specific than elements. | More specific than classes and elements. | Least specific, applies to all instances of the tag. |
| Usage | Used for styling groups of elements with similar attributes. | Used for styling a single element with a unique ID. | Used for styling a specific type of HTML tag. |
| Example | <div class=”container”> | <div id=”header”> | <p> or <h1> |
Is CSS a Class or Element?
It’s important to note that CSS is not a class or an element. Instead, CSS is a language used to style HTML elements. CSS classes are one way to apply styles to specific elements using CSS.
CSS classes are a key tool for styling web pages. By allowing you to combine HTML elements and apply styles collectively, classes make creating a cohesive and well-designed website easy. But to truly master CSS classes, it’s important to understand how they differ from other selectors and how to use them effectively in your CSS code.
How do you type a class in CSS?

To apply CSS styles to specific HTML elements using a class, you must first define the class in your CSS code. Defining a class in CSS is the process of creating a name that can be used to apply specific styles to one or more HTML elements. This name is created using the class selector, which is a period (.) followed by the name of the class.
Defining a Class in CSS
To define a CSS class, you start by typing a period (.) followed by the name of the class you want to create. For example, to create a class called “container,” you would write:
cssCopy code
.container {
  /* CSS styles here */
}
Inside the curly braces, you can add any CSS styles you want to apply to elements with the “container” class.
Applying a Class to an HTML Element
To apply the “container” class to an HTML element, you simply add the class name to the element’s class attribute, like this:
phpCopy code
<div class="container">
  <!-- HTML content here -->
</div>
You can apply the same class to multiple elements, and you can also apply multiple classes to a single element by separating the class names with a space, like this:
phpCopy code
<div class="container red-background">
  <!-- HTML content here -->
</div>
In this example, the element has both the “container” and “red-background” classes applied to it.
Using CSS Classes to Target Elements
Once you’ve defined and applied a class to an HTML element, you can use CSS classes to target those elements in your CSS code. To do this, you simply type the class selector followed by the name of the class, like this:
cssCopy code
.container {
  /* CSS styles here */
}
In this example, any HTML element with the “container” class will be styled using the CSS styles defined inside the curly braces.
Using CSS classes to target elements is a powerful way to apply consistent styles to groups of HTML elements with similar attributes, and it can help make your CSS code more efficient and maintainable.
How to use CSS class in HTML

Using CSS classes in HTML is a straightforward process that involves adding a class attribute to an HTML element and defining the class in your CSS code. One of the main advantages of using CSS classes is that you can apply them to multiple HTML elements and use them to style those elements consistently. Here’s how to apply CSS classes to HTML elements using the “class” attribute and style those elements with CSS:
Applying CSS classes to HTML elements
To apply a CSS class to an HTML element, you need to add a “class” attribute to that element and specify the name of the class you want to use. Here’s an example:
<div class="my-class">This text will be styled using the "my-class" class</div>
In this example, the “class” attribute is set to “my-class”, which is the name of a CSS class defined in your CSS code.
You can also apply multiple CSS classes to a single HTML element by separating them with a space. Here’s an example:
vbnetCopy code
<div class="my-class another-class">This text will be styled using both the "my-class" and "another-class" classes</div>
Using CSS classes to style HTML elements
Once you have applied CSS classes to your HTML elements, you can use those classes to style those elements in your CSS code. To do this, you use the class selector followed by the name of the class you want to style. Here’s an example:
.my-class {
  color: red;
  font-size: 20px;
}
In this example, any HTML element with the “my-class” class will be styled using the CSS properties defined inside the curly braces. You can define as many CSS styles as you want for each class and apply those styles to as many HTML elements as you need. By using CSS classes to style your HTML elements, you can create a consistent look and feel for your website and make updating and maintaining your code easier over time.
What are the types of classes in CSS?
In CSS, there are three types of classes that you can use to style your HTML elements: basic classes, pseudo-classes, and attribute classes. Each type of class offers unique benefits for web design.
Basic Classes
Basic classes are the most common type of CSS class, and they are used to style HTML elements based on their class name. Using basic classes in your CSS allows you to:
- Create reusable styles: By defining a class once, you can apply the same style to multiple HTML elements without having to repeat the same code over and over again.
- Organize your code: Using classes makes it easier to keep your CSS organized and maintainable, especially if you have a large website with many HTML elements.
- Override default styles: Basic classes allow you to override the default styles of HTML elements and create a custom look for your website
To define a basic class, you simply create a class selector followed by the name of the class. For example:
.my-class {
  /* CSS styles here */
}
Pseudo-Classes
Pseudo-classes are used to style elements based on their state or position within the document, rather than their class name. There are several types of pseudo-classes you can use in CSS, including:
- :hover: styles an element when the user hovers over it with the mouse
- :active: styles an element when it is clicked or tapped
- :focus: styles an element when it receives focus, such as when the user tabs to it
Using pseudo-classes in your CSS allows you to:
- Add interactivity: Pseudo-classes can add interactivity to your website by creating visual feedback when the user interacts with your HTML elements.
- Improve accessibility: By styling elements based on their state, you can make your website more accessible to users who rely on assistive technology to navigate the web.
- Create more complex styles: By combining pseudo-classes with other selectors, you can create more complex styles that react to user input.
To use a pseudo-class, you add it to the end of your basic class selector, like this:
.my-class:hover {
  /* CSS styles here */
}
Here’s how to Learn CSS Pseudo Elements In 8 Minutes:
Need to add a YouTube Video here
Attribute Classes
Attribute classes are used to style elements based on the value of one of their attributes, rather than their class name. Using attribute classes in your CSS allows you to:
- Target specific elements: By using attribute selectors, you can target specific HTML elements based on their attributes, such as links that open in a new window.
- Create more flexible styles: Attribute selectors can be combined with other selectors to create more flexible styles that react to changes in your HTML markup.
- Improve SEO: By using attribute selectors to target specific HTML elements, you can make it easier for search engines to understand the content of your website.
For example, you might use an attribute class to style all links that open in a new window, like this:
a[target="_blank"] {
  /* CSS styles here */
}
In this example, the attribute class is “target=”_blank””, which matches all links that have a “target” attribute with a value of “_blank”. You can use any attribute to create an attribute class and combine attributes with other selectors to create more complex styles.
Using these three types of CSS classes, you can create various styles for your HTML elements and customize your website to suit your needs. Consider these characteristics of each class before picking one:
CSS Class Table
| Type of CSS Class | Syntax | Description | When to Use | Pros | Cons |
| Basic Classes | .class-name | Selects elements with a specific class | When you want to apply the same style to multiple elements | Easy to use and understand | Can lead to conflicts if class names are too generic |
| Pseudo-Classes | :pseudo-class | Selects elements based on a specific state or condition | When you want to apply styles to elements based on their state (e.g. hover, active) or position (e.g. first-child) | Can make your CSS more efficient by avoiding the need for extra markup | Limited in the states or conditions that can be selected |
| Attribute Classes | [attribute=value] | Selects elements with a specific attribute and value | When you want to apply styles to elements with a specific attribute or value (e.g. all links with a title attribute) | Very powerful and flexible | Can be more difficult to read and understand than other types of selectors |
Tips for using CSS class selector effectively

CSS classes are essential for web designers and developers, allowing you to apply styles to multiple elements simultaneously and create more efficient, organized code. However, like any tool, it’s important to use them effectively for the best results. Here are some tips for using CSS class selectors effectively:
- Use descriptive class names
- Use consistent naming conventions
- Avoid excessive specificity
- Use inheritance to your advantage
- Keep your code organized
- Avoid Overusing “!important”
- Use descendant selectors and combinators
- Know when to use ID vs class css
7. Use descendant selectors and combinators:
Descendant selectors and combinators are two powerful tools in CSS that allow you to target specific elements within a document. A descendant selector targets an element that is a descendant of another element, meaning it is nested inside it. Combinators are used to target specific relationships between elements, such as parent-child or sibling relationships.
To use descendant selectors, you simply need to specify the ancestor element followed by a space, and then the descendant element you want to target. For example, if you wanted to target all paragraphs within a div, you would use the following code:
cssCopy code
div p {
  /* styles here */
}
This will target all paragraphs that are descendants of the div element. You can also chain multiple descendant selectors together to target elements that are nested at different levels within the document.
Combinators are used to target elements based on their relationship to other elements. There are four types of combinators: the descendant combinator (space), the child combinator (“>”), the adjacent sibling combinator (“+”), and the general sibling combinator (“~”).
The child combinator targets elements that are direct children of another element, while the adjacent sibling combinator targets elements that come immediately after another element. The general sibling combinator targets elements that come after another element, but not necessarily immediately.
To use combinators, you simply need to specify the relationship between the elements you want to target. For example, if you wanted to target all paragraphs that are direct children of a div, you would use the following code:
div > p {
  /* styles here */
}
This will target all paragraphs that are direct children of the div element. You can also use multiple combinators to target elements that have more complex relationships to each other.
1. Use descriptive class names
When naming your CSS classes, use descriptive names that indicate their purpose and usage. This will make it easier to understand your code and make changes later. Avoid using generic or vague names like “box” or “button”; instead, use names specific to your design and content.
Real life example: Let’s say you are building a website for a furniture store, and you want to style a section of the page that displays a list of chairs. Instead of using a generic class name like “chairs” to style the section, you could use a more descriptive class name like “upholstered-chairs” or “dining-chairs”. This not only makes your CSS more organized and easier to read, but it also helps other developers working on the project understand the purpose of the class and how it should be used.
2. Use consistent naming conventions
Use consistent naming conventions for your CSS classes to make your code easier to read and maintain. Whatever convention you choose, be consistent throughout your code.
Real life example: For example, you might use camelCase or kebab-case for class names or prefix all of your classes with a specific identifier like “js-” or “ui-“.
3. Avoid excessive specificityhow
When writing CSS rules for your classes, avoid using overly specific selectors that could cause conflicts or make your code harder to read. Instead, use simple selectors like class names or element names, and avoid chaining too many selectors together.
Real life example:
Let’s say you’re designing a website and you want to style all the buttons on the page with a certain font size, color, and background color. You might write a CSS rule like this:
button {
  font-size: 16px;
  color: white;
  background-color: blue;
}
However, you later realize that there is one specific button on the page that needs to be styled differently. Instead of adding a new class or ID to that button and targeting it specifically, you might be tempted to just add more styles to the existing button selector:
button {
  font-size: 16px;
  color: white;
  background-color: blue;
  border: 1px solid black;
  padding: 10px;
}
While this will certainly style the specific button the way you want it to, it also adds unnecessary specificity to the button selector. This can make it harder to override styles later on if you need to make changes. Instead, it’s better to create a new class or ID for the specific button and target it that way:
button.special {
  font-size: 18px;
  color: black;
  background-color: yellow;
  border: 2px solid red;
  padding: 12px;
}
This way, you’re not only avoiding excessive specificity, but you’re also making your code more modular and easier to maintain in the long run.
4. Use inheritance to your advantage
CSS classes can inherit styles from their parent elements, which can save you time and reduce the amount of code needed. Take advantage of inheritance by applying styles to parent elements that can be inherited by their child elements.
Real life example:
Let’s say you have a website with multiple pages, and you want to maintain a consistent font style throughout the site. Instead of manually setting the font for every single element on each page, you can define a CSS class for the font style you want and apply it to a parent element that encompasses all the content on the page.
For example, you could define a CSS class called “body-font” with the font family, size, and color you want, and apply it to the body tag of your HTML document. This way, all the text on your site will inherit the font style you defined in the “body-font” class without you having to manually apply it to each individual element.
This not only saves time and effort, but also makes it easier to maintain consistency across your site. If you ever need to make a change to the font style, you can simply update the “body-font” class and all the text on your site will be updated accordingly.
5. Keep your code organized
To make your code easier to read and maintain, keep your CSS classes organized in a logical order and group related classes together. You might use comments or whitespace to separate different sections of your code, or use a CSS preprocessor like Sass or Less to organize your code into modules.
Real life example:
Let’s say you’re designing a website for a fashion brand and you have a section that displays a variety of products. You want each product to have an image, a title, and a price displayed in a neat grid format.
To keep your code organized, you could use CSS classes to group the styling for each element. For example, you could create a class called “product-container” to style the overall container for each product, and then create separate classes for the image, title, and price elements.
Your HTML might look something like this:
<div class="product-container">
  <img src="product-image.jpg" class="product-image">
  <h2 class="product-title">Product Title</h2>
  <p class="product-price">$19.99</p>
</div>
And your CSS might look something like this:
.product-container {
  display: inline-block;
  margin: 10px;
  border: 1px solid #ccc;
  padding: 10px;
}

.product-image {
  width: 100%;
  height: auto;
}

.product-title {
  font-size: 16px;
  margin: 10px 0;
}

.product-price {
  font-size: 14px;
  color: #888;
}
By using separate classes for each element, you can easily make changes to the styling of each element without affecting the others. And by grouping the styling for each product within the “product-container” class, you can make global changes to the styling of all products at once.
6. Avoid Overusing “!important”
The !important rule should be used sparingly as it can make it difficult to override styles. Instead of using !important, try to increase the specificity of your selectors or restructure your code to avoid conflicts.
Real life example:
Imagine you’re working on a website that has a stylesheet with a rule for all headings, which sets the font-size to 24px. However, on a particular page, you want to increase the font-size of one specific heading to 36px.
Without using “!important”, you can simply create a new CSS rule for that specific heading, like this:
h1.special-heading {
  font-size: 36px;
}
This will override the default rule for headings because it has a higher specificity.
However, if you use “!important” to force the font-size change, like this:
h1 {
  font-size: 24px !important;
}

h1.special-heading {
  font-size: 36px !important;
}
You’re relying on the “important” keyword to override the default rule, which can make your CSS harder to maintain and modify in the future. Additionally, if you have conflicting “!important” rules, it can be difficult to predict which rule will take precedence.
7. Use descendant selectors and combinators:
Descendant selectors and combinators are two powerful tools in CSS that allow you to target specific elements within a document. A descendant selector targets an element that is a descendant of another element, meaning it is nested inside it. Combinators are used to target specific relationships between elements, such as parent-child or sibling relationships.
To use descendant selectors, you simply need to specify the ancestor element followed by a space, and then the descendant element you want to target. For example, if you wanted to target all paragraphs within a div, you would use the following code:
div p {
  /* styles here */
}
This will target all paragraphs that are descendants of the div element. You can also chain multiple descendant selectors together to target elements that are nested at different levels within the document.
Combinators are used to target elements based on their relationship to other elements. There are four types of combinators: the descendant combinator (space), the child combinator (“>”), the adjacent sibling combinator (“+”), and the general sibling combinator (“~”).
The child combinator targets elements that are direct children of another element, while the adjacent sibling combinator targets elements that come immediately after another element. The general sibling combinator targets elements that come after another element, but not necessarily immediately.
To use combinators, you simply need to specify the relationship between the elements you want to target. For example, if you wanted to target all paragraphs that are direct children of a div, you would use the following code:
div > p {
  /* styles here */
}
This will target all paragraphs that are direct children of the div element. You can also use multiple combinators to target elements that have more complex relationships to each other.
8. Know when to use ID vs class css
In CSS, both classes and IDs are used to target and style specific HTML elements. However, there are some important differences between them that make it important to understand when to use each one.
Firstly, IDs are meant to be unique on a page, while classes can be used multiple times. This means that an ID should only be used once per HTML element, while a class can be used on multiple elements. Using IDs incorrectly can lead to unexpected results, as the same ID cannot be used more than once.
Secondly, IDs have a higher specificity than classes. This means that if there is a conflict between a class and an ID targeting the same element, the ID will always take precedence. This can be useful in certain situations, but can also cause issues if not used properly.
In general, it is recommended to use IDs sparingly and only when targeting a unique element on the page, such as a header or footer. Classes are more flexible and can be used for targeting multiple elements with similar styles.
Knowing when to use classes vs IDs can help you write cleaner and more efficient CSS code, while also preventing potential conflicts and issues. Here’s a great video for more detail:
Using “CSS not class” selectors
The “not” pseudo-class selector is a powerful tool for web developers because it allows them to apply styles to elements that do not have a specific class, without assigning a class to all other elements on the page. This can be particularly useful in cases where there are many elements on a page and it would be time-consuming to assign a class to each one individually. Using the “not” selector allows developers to save time and streamline their code.
To use the “not” selector, simply add “:not” to your CSS selector, followed by the class you want to exclude.
- Begin by selecting the type of element you want to target, followed by the “:not” pseudo-class selector.
p:not()
2. Inside the parentheses of the “:not” pseudo-class selector, add the class you want to exclude.
p:not(.special)
3. Close the parentheses and add any additional properties or values you want to apply to the selected element(s).
p:not(.special) {
  color: blue;
  font-size: 18px;
}
4. Save your CSS file and refresh your webpage to see the changes take effect.
For example, if you want to select all paragraphs on a page except for those with a class of “special”, you would use the following selector: “p:not(.special)”.
It’s important to note that the “not” selector only works with classes, not IDs or other types of selectors. Additionally, using the “not” selector can increase the specificity of your CSS rules, which can cause conflicts with other styles on the page. Therefore, it’s important to use the “not” selector judiciously and avoid overusing it.
Overall, the “not” selector can be a useful tool in your CSS arsenal, but it’s important to understand its limitations and use it carefully to avoid conflicts with other styles on your page.
Elevate web design with CSS Class Selector
In summary, understanding how to use CSS class selectors effectively is crucial for creating beautiful and functional web pages. By knowing the various types of classes available and their differences, you can create more specific and efficient styles. Remember to optimize specificity and use the “not” selector when necessary to avoid conflicting styles. So experiment with the CSS class selector, and take your web design skills to the next level. Start incorporating them into your web projects today and see the difference they can make!
Related Articles
-
 Uncategorized
Get Accurate Website Layout Easily with CSS Calc
Have you ever struggled to create a responsive website layout that works seamlessly across different screen sizes and devices? As a web designer or developer, you know that achieving a perfect layout can be challenging, especially when you need to…
March 17, 2023 -
Uncategorized
The Top 16 Design System Examples for Devs
Introduction Every successful team has a set of roadmaps while developing its products. These do not only improve their productivity but also help them develop the product to a standard. In this article, we'll define design systems and also provide…
June 9, 2022


