- Introduction
- What is React JSX?
- React JSX Element vs HTML Tag
- HTML Tag Samples:
- JSX Element Samples:
- Difference Between HTML Tag and JSX Element - Table
- React without JSX
- JSX Transform
- What is React createElement() Method?
- React.createElement() Syntax
- React.createElement() Arguments
- Setting Up ReactJS
- Creating React Elements with createElement()
- Render React createElement() to Dom
- Adding Attributes to Elements with createElement()
- Adding Children to Elements with createElement()
- Adding EventListener to Element using createElement()
- Array Mapping in React.createElement()
- Tips to writing React without JSX
- Import createElement from React
- Tool to transform JSX to React Create Element Method
- BabelJS.io REPL
- Wrapping Up
- Interesting Reads From Our Blogs
Introduction
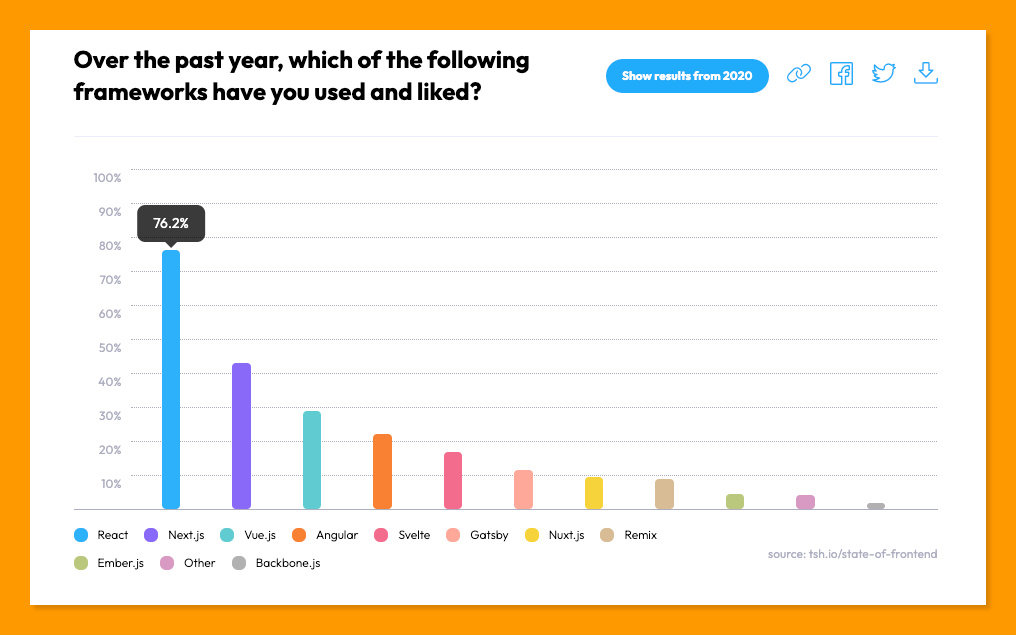
React is an open-source JavaScript library developed by Facebook and it’s the most used and liked Frontend library by over 76% of developer respondents in The State of Frontend 2022.
In this article, we’ll take a deep dive into how React.js works without JSX to render HTML data to the DOM and how JSX actually works behind the scenes using React.createElement() method.
This article assumes that you have an intermediary knowledge about React as a library and that you know what is referred to as a component, prop and HTML attributes.
Check out the CopyCat plugin for React if you’re seeking for amazing React tools to help you build component code faster and be production ready sooner than your competition!
What is React JSX?
JSX (JavaScript XML) is a JavaScript extension syntax that lets us write HTML and JavaScript code within a React component to create a user interface. Learn more about React JSX.
It’s important to note that React does not support regular HTML tags, and HTML tags written in JSX are referred to as React JSX elements.
React JSX Element vs HTML Tag
In this section, we’ll discuss the difference between the React JSX elements and the HTML tag.
There might not be a clearly visible difference between a basic JSX and an HTML tag syntax, for instance, an h1 tag with “Hello, World” text can be written in HTML as follows:
<h1> Hello, World </h1>
While the same HTML element above can be written in JSX as shown below:
<h1> Hello, World </h1>
The difference becomes clear when we want to add HTML attributes like class identifier, and event listener as discussed below:
HTML Tag Samples:
Figure 1.0 – Adding class name in HTML
<h1 class="heading"> Hello, World </h1>
1.1 – Adding event listener in HTML
<button onclick="login()"> Click to login </button>
1.3 – Writing multiple HTML tags
<h1>Heading 1</h1>
<h2>Heading 2</h2>
<h3>Heading 3</h3>
<h4>Heading 4</h4>
JSX Element Samples:
Figure 2.0 – Add class name in JSX
<h1 className="heading"> Hello, World </h1>
2.1 – Adding event listener in JSX element
<button onClick={()=>login()}> Click to Login </button>
2.2 – JSX element can be a self-closing tag
<h1 children={"Good morning"} />
2.3 – Adding multiple JSX elements requires a parent wrapper
<section>
  <h1>Heading 1</h1>
  <h2>Heading 2</h2>
  <h3>Heading 3</h3>
  <h4>Heading 4</h4>
</section>
Difference Between HTML Tag and JSX Element – Table
Using each above example in Figures, below are the difference between an HTML tag and a JSX element.
| HTML Tag | JSX Element |
| HTML tags receive attributes i.e class and onclick in Figures 1.0 and 1.1 | JSX elements receive props i.e className and onClick in Figures 2.0 and 2.1 |
| Writing attributes in camelCase is optional i.e onclick or onClick | Writing props in camelCase is compulsory i.e className and onClick |
| Opening and closing tags are compulsory for HTML tags as demonstrated in Figures 1.0 and 1.1 | JSX elements can be self-closing tags by passing the text in the children prop as shown in Figure 2.2 |
| Multiple elements can be written in HTML as shown in Figure 1.3 | Multiple or nested elements in JSX must be written within a parent component to avoid error as shown in Figure 2.4 |
React without JSX
JSX is optional in React and it’s not the only way to describe how the input data will be displayed on the UI. JSX is a syntactic sugar for writing React.createElement() method, which is the native method of writing HTML in React.
JSX Transform
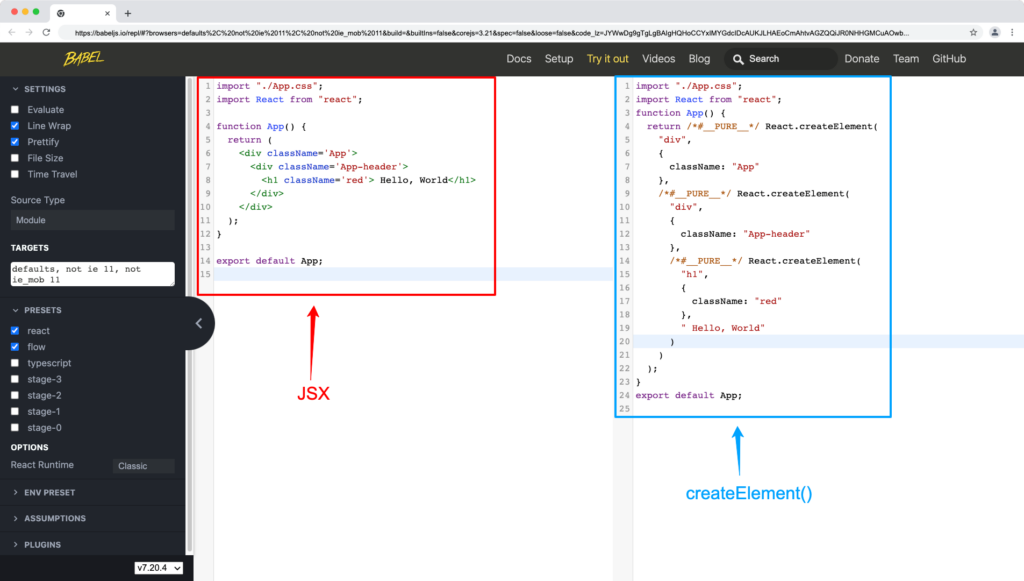
The browser does not understand JSX by default because it’s not a valid JavaScript syntax, so React uses a transpiler known as Babel under the hood to transform the JSX element within a component to React.createElement(), a browser-compatible version.
JSX only makes writing elements within components easier than using React.createElement() method, nothing more, nothing less.
What is React createElement() Method?
The createElement() method is an API in React library similar to the [document.createElement()](<https://developer.mozilla.org/en-US/docs/Web/API/Document/createElement>) method used in JavaScript to programmatically create HTML elements specified by tagName, or an HTMLUnknownElement if the tagName isn’t recognized as a valid HTML tag.
Because ReactJS uses the Virtual Dom to render elements to the UI, React.createElement method will return an object that allows React to perform performance optimizations using the Virtual DOM.
React.createElement() Syntax
The React.createElement() syntax is as follows:
React.createElement(arg1, arg2, arg3);
The createElement method as shown above accepts three arguments which we’ll discuss in the next section.
React.createElement() Arguments
A typical HTML tag has 3 properties, a tag name, attributes (referred to as prop in JSX) and children, which is the element rendered within the tags.
The above explanation can be written as follow in React.createElement() method:
React.createElement(tagName, propObject, children);
- Where the tagName is any valid HTML tag name such as div, h1, span etc.
- The propObject is any attribute you wish to set to the HTML tag i.e className, id or name etc.
- The children are any element you want to render within the HTML tag i.e text, number or another React component.
The two arguments that are required by createElement() are the tagName and the children.
Given that we want to create an h1 element with a class of heading and a text which says Hello, World we can write this using React.createElement() method as follows:
React.createElement("h1", { className: "heading" }, "Hello, World");
So far, we’ve learned that we can create elements in React using React.createElement() method. We’ll go a step further in the next section to create a React project and a few components without using JSX.
Setting Up ReactJS
Skip this section if you have an existing React application playground.
Or use the following command to create a new react application:
npx create-react-app react-without-jsx
Next, run the following command to navigate to your newly generated app directory:
cd react-without-jsx
Then run the following command to start your React server:
yarn start // or npm start
Your server should launch in your browser at http://localhost:3000/, as shown below:

In the next sections, we’ll start by creating elements using the createElement() method.
Creating React Elements with createElement()
Writing elements within the component with createElement() is a lot different from using JSX.
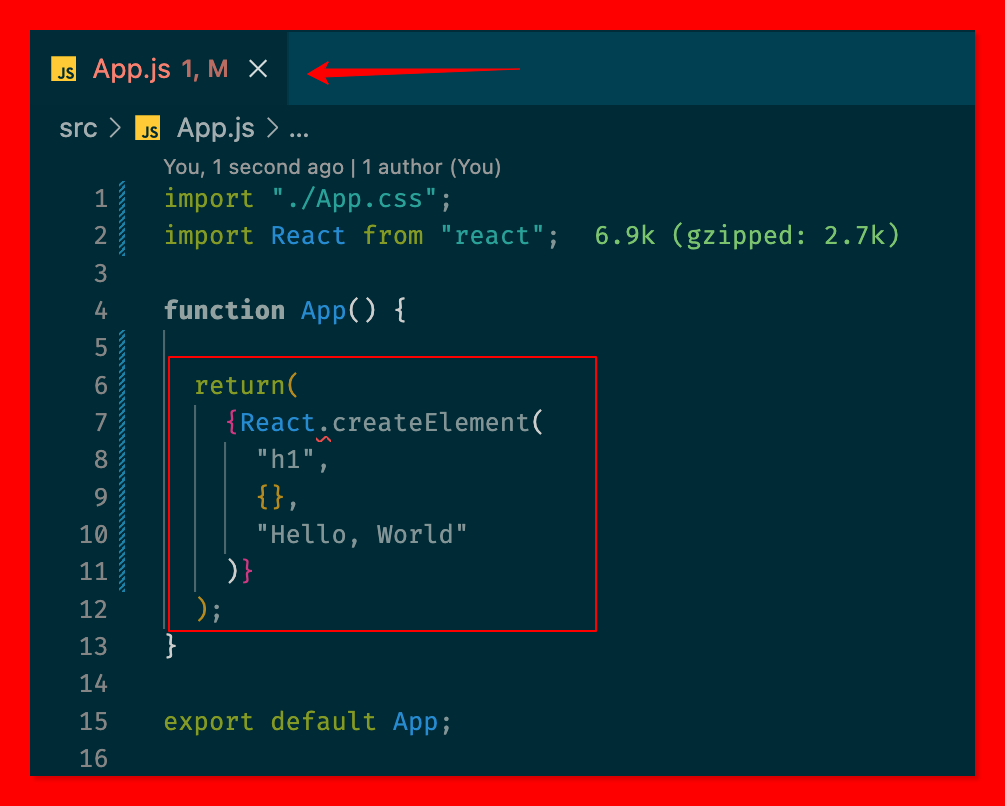
- Creating an element with the createElement() method does not require the regular curly bracket we use to write JavaScript within the return statement. This will only throw an error as shown below:
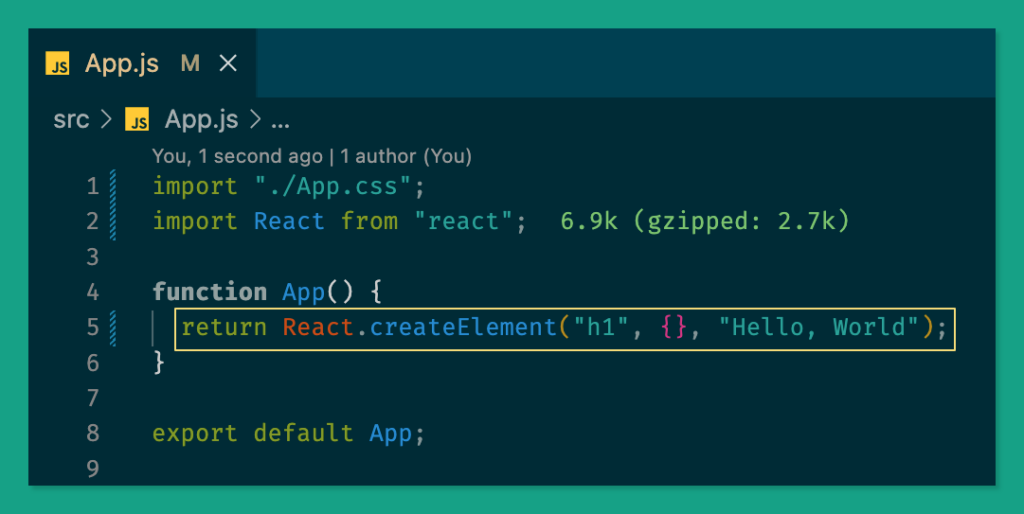
- You can return the React.createElement() expression as an inline statement as shown below:
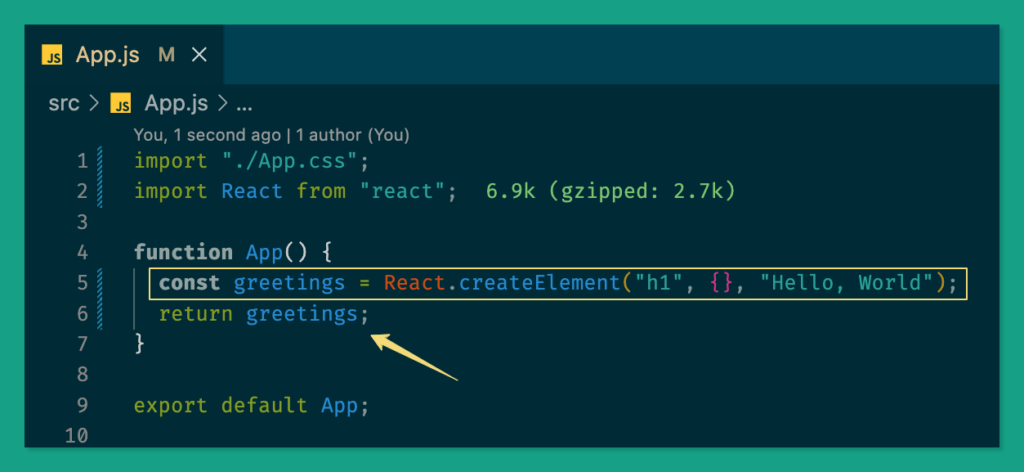
- You can also assign the element created using React.createElement() to a variable as follows:
Render React createElement() to Dom
Rendering elements created using the createElement() method does not require any additional configuration if you update your App.js with any of the methods used in creating elements:
Method 1 – Inline React Element:
import "./App.css";
import React from "react";

function App() {
  return React.createElement("h1", {}, "Hello, World");
}

export default App;
Method 2 – Named React Element:
import "./App.css";
import React from "react";

function App() {
  const greetings = React.createElement("h1", {}, "Hello, World");
  return greetings;
}

export default App;
We will have the same output rendered when you visit your browser.
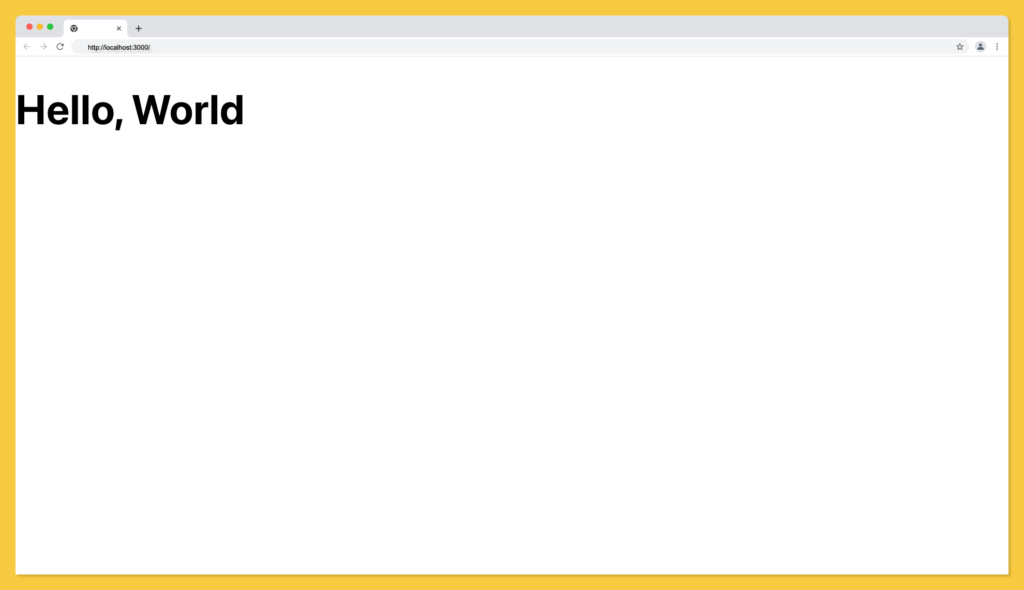
To this point in this article, we’ve learned how to create elements and render them to the DOM using the createElement() method. In the next section, we’ll learn how to add attributes such as className, id etc to the created elements.
Adding Attributes to Elements with createElement()
Attributes are essential properties of an element that enables us to uniquely identify and style a specific element in CSS or manipulate them programmatically using JavaScript.
Given that we have a className of red in our App.css file, update your App.css file to contain the CSS below:
/* keep previous styles */
.red{
  color: red;
}
We can add the red class name to our Hello, World text as follows:
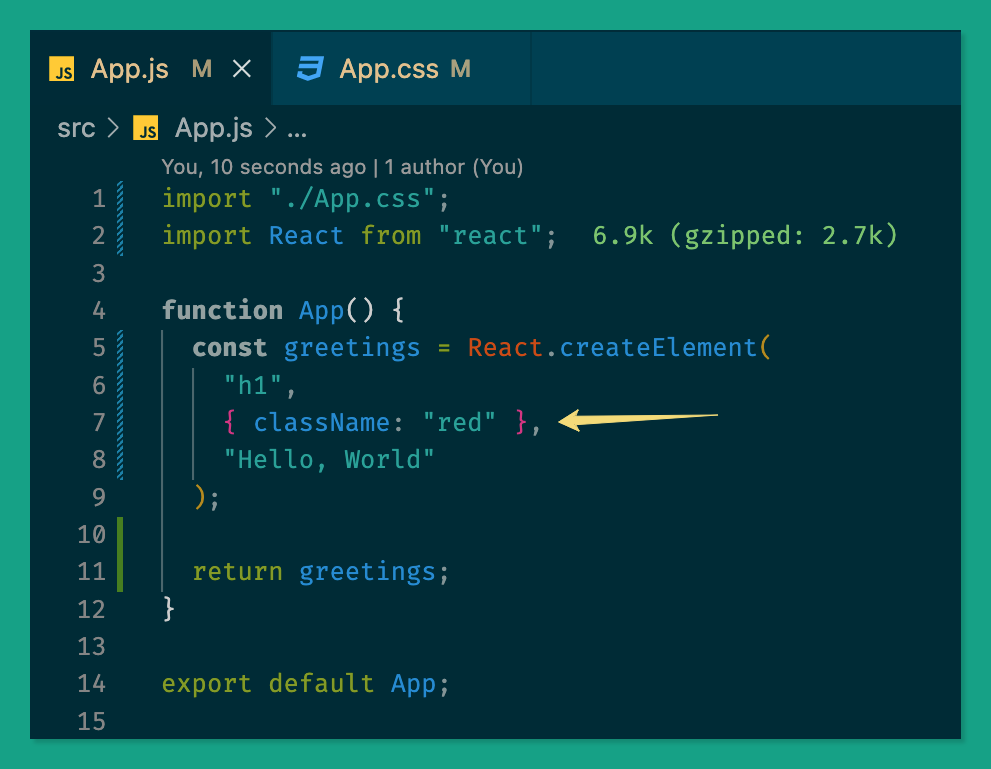
The expression above can be written as follows in JSX:
<h1 className='red'> Hello, World</h1>
Update your App.js file with React.createElement() method code below:
import "./App.css";
import React from "react";

function App() {
  const greetings = React.createElement(
    "h1",
    { className: "red" },
    "Hello, World"
  );

  return greetings;
}

export default App;
The second argument of the createElement(arg1, arg2, arg3) accepts the attributes of the element we’ve created.
When you visit your browser the Hello, World text should now have a red colour:
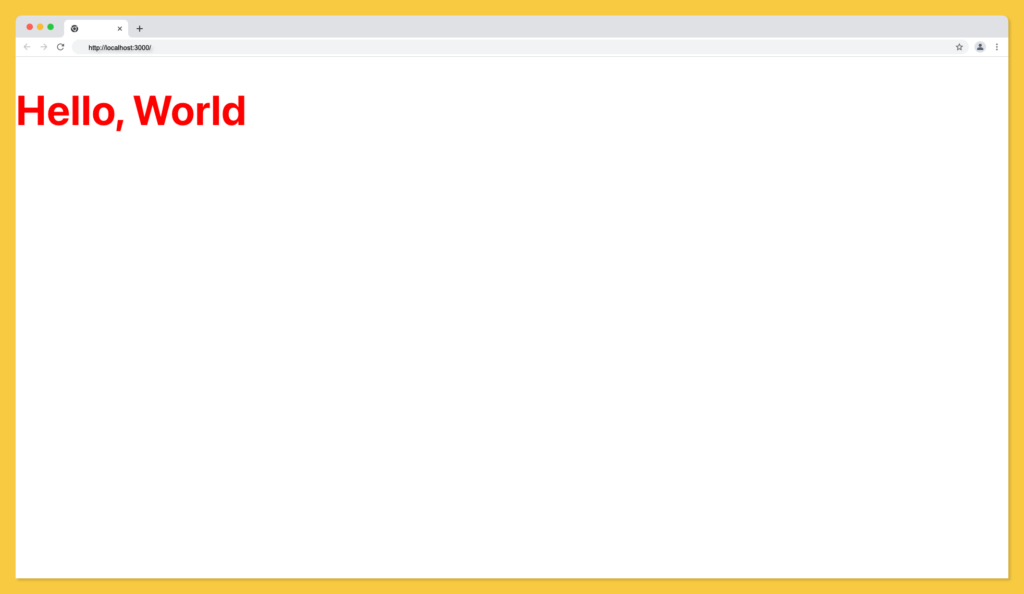
You can add multiple attributes to an element within the object argument as shown below:
React.createElement(
    "h1",
    { className: "red", id: "element-identifier" }, // example
    "Hello, World"
  );
Adding Children to Elements with createElement()
In this section, we’ll discuss how to nest elements using the createElement() method.
Given that we have a component with the following JSX structure:
import "./App.css";
import React from "react";

function App() {
  return (
    <div className='App'>
      <div className='App-header'>
        <h1 className='red'> Hello, World</h1>
      </div>
    </div>
  );
}

export default App;
We can reproduce this using the createElement() method as follows:
import "./App.css";
import React from "react";

function App() {
  const greetings = React.createElement(
    "h1",
    { className: "red", id: "element-identifier" },
    "Hello, World"
  );

  const greetingsWrapper = React.createElement(
    "div",
    {
      className: "App-header",
    },
    greetings
  );

  const container = React.createElement(
    "div",
    {
      className: "App",
    },
    greetingsWrapper
  );

  return container;
}

export default App;
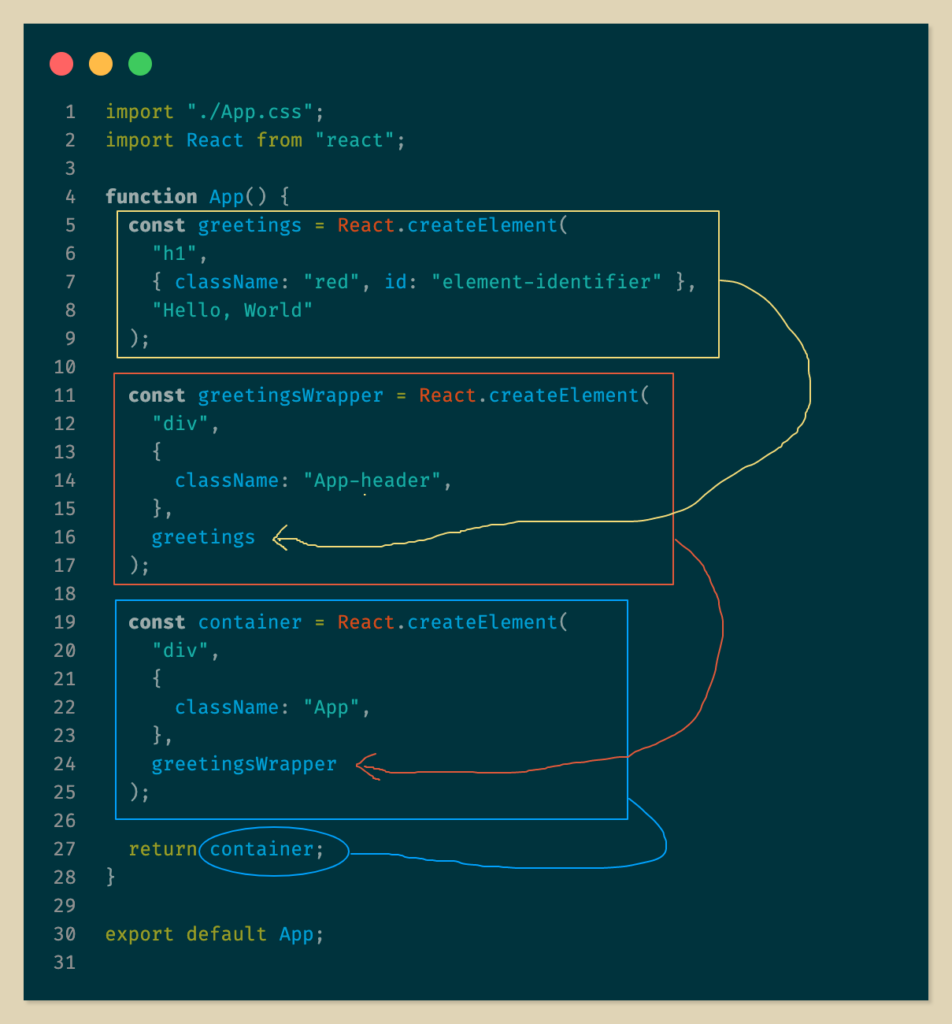
From the above code written:
- We created the h1 element with className of red and a child of Hello, World and assign it to variable named greetings.
- Next, we created the div element with a className of App-header and set the named variable greetings as its child.
- Then, we created another div element with a className of App and set greetingsWrapper as its child.
- Finally, we’re returning the greetingsWrapper to the DOM.
Below is a visual explainer of the above steps:
Adding EventListener to Element using createElement()
An element event listener is also an attribute, so we can declare an event such as onClick, onChange etc within the element tag like this:
import "./App.css";
import { createElement } from "react";

function App() {
  const handleClick = () => {
    console.log("Clicked");
  };

  const actionBtn = createElement(
    "button",
    { className: "btn", onClick: handleClick }, // here
    "Click Me!"
  );

  return actionBtn;
}

export default App;
The above component will function as follows on your browser:

If the function is expecting an argument, you can pass arguments to the function like this:
import "./App.css";
import { createElement } from "react";

function App() {
  const handleClick = (name) => {
    console.log("Clicked by: " + name);
  };

  const actionBtn = createElement(
    "button",
    { className: "btn", onClick: () => handleClick("unclebigbay") }, // updated line
    "Click Me!"
  );

  return actionBtn;
}

export default App;
We can now receive arguments from the onClick declaration, and our function will render it like this:

Array Mapping in React.createElement()
We can render elements dynamically using the UI using the JavaScript Array map() method.
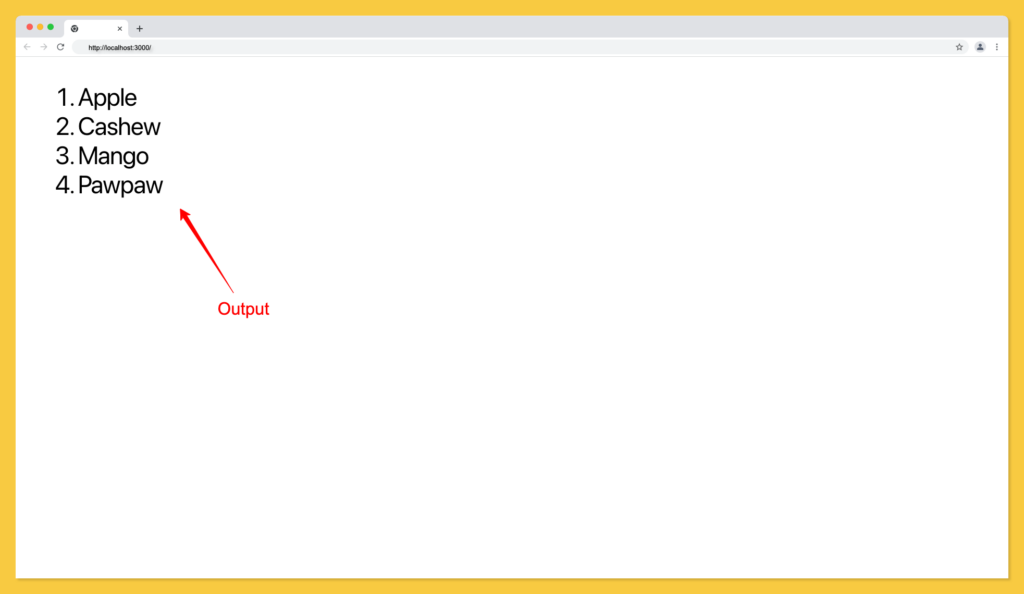
Given that we have an array of fruits and we want to render them to the DOM as an ordered list. We can write our component using React.createElement() like this:
import React from "react";
import "./App.css";

function App() {
  const fruits = ["Apple", "Cashew", "Mango", "Pawpaw"];

  return React.createElement(
    "ol",
    {className: "list-container"},
    fruits.map((list) => React.createElement("li", {id: "list-item"}, list))
  );
}

export default App;
The output of the above component will be as follows:
You can go ahead and play around with the map array method using the createElement() method with different data types and structures i.e render the following data to the UI:
const users = [
    {
      id: 1,
      name: "John Doe",
      stack: "Frontend",
      favFruits: ["Mango", "Dates", "Papaya"],
    },
    {
      id: 2,
      name: "Sam Dion",
      stack: "Frontend",
      favFruits: ["Cashew", "Lemon", "Guava"],
    },
    {
      id: 3,
      name: "Michael Steph",
      stack: "Frontend",
    },
    {
      id: 4,
      name: "Ruth Paul",
      stack: "Frontend",
      favFruits: ["Cashew", "Apples", "Papaya"],
    },
    {
      id: 5,
      name: "Diana Jon",
      stack: "Frontend",
      favFruits: ["Mango", "Pawpaw"],
    },
  ];
Tips to writing React without JSX
Import createElement from React
Instead of chaining the createElement method from React library every time, you can import it directly as shown below:
import "./App.css";
import { createElement } from "react"; // this line

function App() {
  const greetings = createElement(
    "h1",
    { className: "red", id: "element-identifier" },
    "Hello, World"
  );

  return greetings;
}

export default App;


Assign React.createElement to a Smaller Variable Name

Another way to improve working with the createElement is by assigning the React.createElement to a small variable name as follows:

import "./App.css";
import React from "react";

function App() {
  const el = React.createElement; // this line

  const greetings = el(
    "h1",
    { className: "red", id: "element-identifier" },
    "Hello, World"
  );

  return greetings;
}

export default App;
Using this method will make it easier to easily reference the React.createElement using a simple and smaller variable name.
Tool to transform JSX to React Create Element Method
Below is an online tool you can make use to convert your JSX code to createElement() method.
BabelJS.io REPL
Babel is a compiler for writing next-generation JavaScript. See the Babel team here. They provide an online REPL environment where you can write your JSX and convert it to a browser-compatible version (createElement()). Click here to launch BabelJS REPL.
Wrapping Up
We learned in this article that JSX isn’t the only way to describe how the UI will look; we can also use React.createElement() method. It is entirely up to you whether to use the createElement() method or the JSX which is the syntactic sugar of the createElement() method.
Finally, you can find more incredible articles like this on our blog at CopyCat. CopyCat is a tool that saves you about 35% of development time by converting your Figma files to an up-and-running React project. Check it out here.
Interesting Reads From Our Blogs
- The Most Complete Guide for React Navigation
- React Hooks: Understanding How React useRef Works
- How to Add Toast Notifications to a React App Using React Toastify
- React Datepicker Complete Guide With Examples
Happy Coding 👨🏾💻


