- Introduction
- What is Material UI Autocomplete Component?
- Setting up a React App
- Installing Material UI Library
- How does Autocomplete work in Material UI?
- Rendering Material UI Autocomplete Component
- Rendering Material UI Autocomplete Component As Normal Text Input
- Material UI Autocomplete Free Solo Prop
- Getting Multiple Values from Material UI Autocomplete Component
- Getting the Selected Value from the Material UI Autocomplete Component
- Getting Multiple Selected values from the Material UI Autocomplete
- Setting Default Multiple Selected Values in the Material UI Autocomplete
- Rendering Array Of Objects in Material UI Autocomplete Component
- Wrapping Up
- Interesting Reads From Our Blogs
Do you want to be more efficient? Consider CopyCat, an AI-powered plugin that will convert your Figma design to UI code, allowing you to concentrate on the app’s business logic.
Introduction
According to Wikipedia: Autocomplete speeds up human-computer interactions when it correctly predicts the word a user intends to enter after only a few characters have been typed into a text input field.
In this article, we’ll look at how to use the Material UI autocomplete component. Speed up user interaction with your web application by incorporating an autocomplete component into your form select element, which leads to better search results.
What is Material UI Autocomplete Component?
Material UI Autocomplete component is a great way to implement an autocomplete feature in React and according to the MUI documentation. “It is a normal text input enhanced by a panel of suggested options.”
This component provides predictive search result that makes it possible for the user to know if there are related result for their keyword even before they complete the word or sentence they’re typing.
Below is a demo of the Material UI Autocomplete component in action:

Setting up a React App
Use the following command to create a new react application:
npx create-react-app my-app
Next, run the following command to navigate to your newly generated app directory:
cd my-app
Then run the following command to start your React server:
yarn start
Or using npm:
npm start
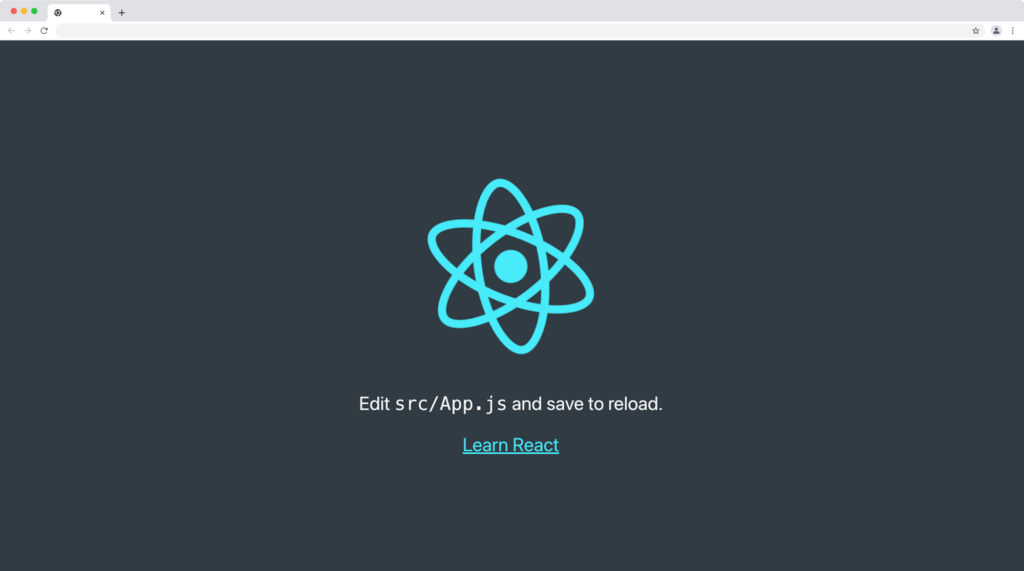
Your server should launch in your browser at http://localhost:3000, as shown below:
Installing Material UI Library
In this section, we’ll install the Material UI library. Run the command below to install Material UI to your project:
npm:
npm install @mui/material @emotion/react @emotion/styled
yarn:
yarn add @mui/material @emotion/react @emotion/styled
How does Autocomplete work in Material UI?
Using the Autocomplete component is relatively simple. You’ll need to provide the Autocomplete component with a list of options and a callback function that will handle the selection when the input changes.
Rendering Material UI Autocomplete Component
Given that our task is to display an array of pets in a searchable dropdown list from which users can choose their favorite pet.
const pets = ["Cat", "Dog", "Bird", "Pigeon"];
To start;
- Create a new component folder inside the src folder.
- Next, create a new PetsList.jsx file inside the component folder.
Copy and paste the code below inside the PetsList.jsx file:
import { Autocomplete, TextField } from "@mui/material";
import React from "react";

export const PetLists = () => {
  const pets = ["Cat", "Dog", "Bird", "Pigeon"];
  return (
    <Autocomplete
      style={{ width: "20%" }}
      options={pets}
      renderInput={(params) => (
        <TextField label='Select your favourite pet' {...params} />
      )}
    ></Autocomplete>
  );
};
ThePetLists component declares a constant variable called pets and sets it equal to an array of four pets names.
Next, we render the Autocomplete component with an optional style of 20% width of it’s parent element, a required options prop set to the pets array we created, this will be the dropdown options, and a renderInput prop that returns another MUI component called TextField with a label and params rest operator.
Finally, render the PetsList component in your App.js file as shown below:
import React from "react";
import { Grid } from "@mui/material";
import { PetLists } from "./components/PetLists";

function App() {
  return (
    <React.Fragment>
      <Grid
        container
        direction='column'
        alignItems='center'
        justifyContent='center'
        style={{ minHeight: "100vh" }}
      >
        <PetLists />
      </Grid>
    </React.Fragment>
  );
}

export default App;
We use the MUI Grid component to center the PetLists component horizontally and vertically. More information on the MUI grid component is here.
When you visit your browser, the PetLists component should look something like this:

Cool 😎, right!
Rendering Material UI Autocomplete Component As Normal Text Input
We can render customized components or elements such as the native HTML input tag in the renderInput prop instead of the MUI TextField component as shown below:
import { Autocomplete } from "@mui/material";
import React from "react";

export const PetLists = () => {
  const pets = ["Cat", "Dog", "Bird", "Pigeon"];

  return (
    <Autocomplete
      style={{ width: "20%" }}
      options={pets}
      renderInput={(params) => {
        return (
          <div ref={params.InputProps.ref}>
            <label for='pets-lists'>Select your favourite pet:</label>
            <input
              id='pets-lists'
              type='text'
              placeholder='Start typing...'
              style={{
                border: "1px solid #cccccc",
                padding: "10px",
                width: "100%",
              }}
              {...params.inputProps}
            />
          </div>
        );
      }}
    ></Autocomplete>
  );
};
It is important to pass the ref to the parent container of the custom component or element and also pass or spread the …params.inputProps to the element in order to be controlled by MUI.
The above Autocomplete component with the native input tag will look and function something like this:

Material UI Autocomplete Free Solo Prop
Pass the freesolo prop to the Autocomplete component if you wish to render the Material UI Autocomplete component to accept undetermined values, the freesolo prop is declared in the Autocomplete component as follows:
import { Autocomplete, TextField } from "@mui/material";
import React from "react";

export const PetLists = () => {
  const pets = ["Cat", "Dog", "Bird", "Pigeon"];
  return (
    <Autocomplete
      freesolo
      style={{ width: "20%" }}
      options={pets}
      renderInput={(params) => {
        return <TextField
          label='Select your favourite pet'
          {...params}
        />
      }}
    ></Autocomplete>
  );
};
The primary aim of this prop is to provide search suggestions for inputs like Google’s search engine that usually contains an arbitrary values, similar or previous searches from a predefined set of values.
Getting Multiple Values from Material UI Autocomplete Component
Pass the multiple prop to the Autocomplete component to enable multi-selection in the dropdown.
import { Autocomplete, TextField } from "@mui/material";
import React from "react";

export const PetLists = () => {
  const pets = ["Cat", "Dog", "Bird", "Pigeon"];

  return (
    <Autocomplete
      multiple
      style={{ width: "20%" }}
      options={pets}
      renderInput={(params) => {
        return <TextField label='Select your favourite pet' {...params} />;
      }}
    ></Autocomplete>
  );
};
This way, the user will be able to choose as many options as they want from the available sets of options. The MUI multi-select with autocomplete will look and function like below:

Getting the Selected Value from the Material UI Autocomplete Component
The autocomplete component provides us with some useful props to control the input value and the selected options in the Autocomplete component.
- The value prop: To control the option selected by the user.
- The onChange prop: To trigger an action when a new option is selected.
- The inputValue prop: To control and access the keyword entered by the user.
- The onInputChange prop: To trigger an action each time the user types a keyword in the search input.
We’ll make use of the useState hook to keep track of the selected option (value) from the autocomplete component, we’ll also console.log and render the selectedPet in the browser, so we can see the changes in real time.
import { Autocomplete, TextField } from "@mui/material";
import React, { useState } from "react";

export const PetLists = () => {
  const pets = ["Cat", "Dog", "Bird", "Pigeon"];
  const [selectedPet, setSelectedPet] = useState(null);
  const [petInputValue, setPetInputValue] = useState("");

  console.log(selectedPet);

  return (
    <React.Fragment>
      <h5 style={{ marginBottom: "1rem", textAlign: "left" }}>
        You selected:{" "}
        <span style={{ color: "dodgerblue", fontWeight: "800" }}>
          {selectedPet}
        </span>
      </h5>
      <Autocomplete
        style={{ width: "40%" }}
        options={pets}
        value={selectedPet}
        onChange={(event, newPet) => {
          setSelectedPet(newPet);
        }}
        inputValue={petInputValue}
        onInputChange={(event, newPetInputValue) => {
          setPetInputValue(newPetInputValue);
        }}
        renderInput={(params) => {
          return <TextField label='Select your favourite pet' {...params} />;
        }}
      ></Autocomplete>
    </React.Fragment>
  );
};
The above code will function as demonstrated below:
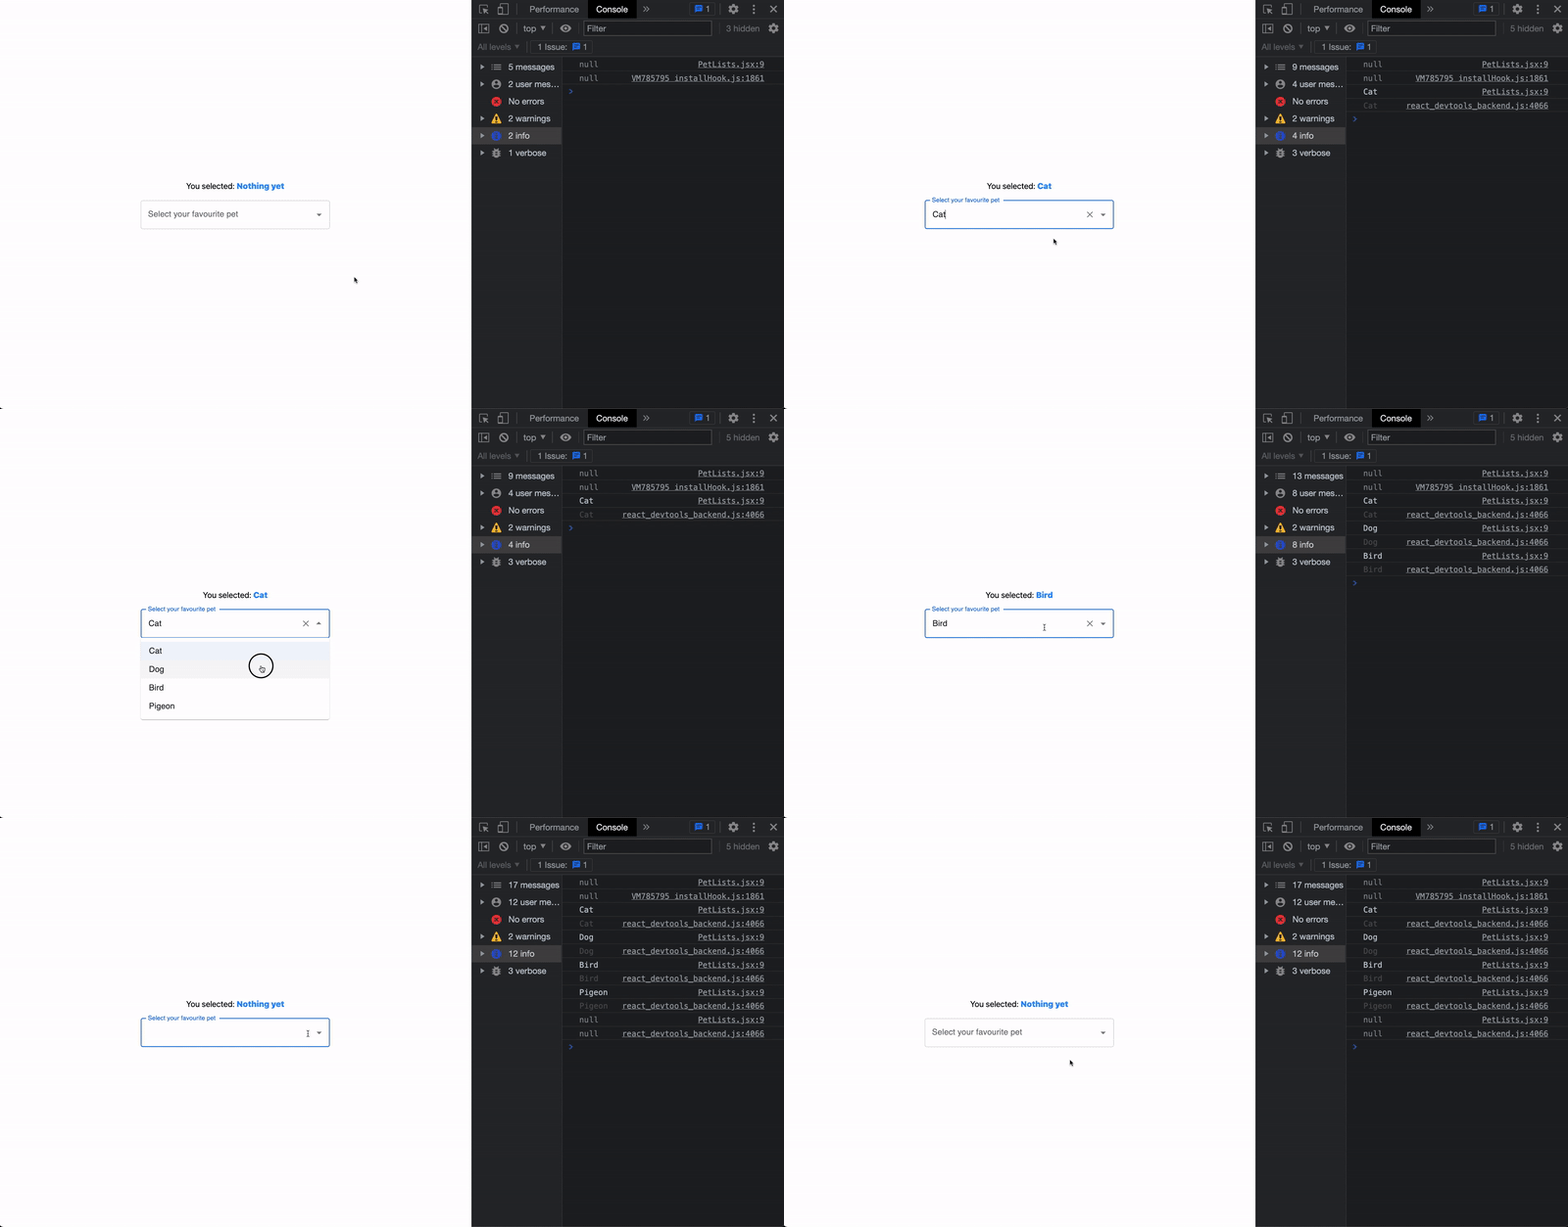
As demonstrated above, the option selected is captured and rendered in both dom and the browser console.
Getting Multiple Selected values from the Material UI Autocomplete
For the multiple selected values, the initial value for the useState will be an empty array and we’ll remove the value prop from the Autocomplete component, MUI will handle the value for us once we pass the multiple prop in the Autocomplete component.
We’ll also map the selectedPets to the UI to see the selected options in realtime.
import { Autocomplete, TextField } from "@mui/material";
import React, { useState } from "react";

export const PetLists = () => {
  const pets = ["Cat", "Dog", "Bird", "Pigeon"];
  const [selectedPets, setSelectedPets] = useState([]);
  const [petInputValue, setPetInputValue] = useState("");

  console.log(selectedPets);

  return (
    <React.Fragment>
      <h5 style={{ marginBottom: "1rem", textAlign: "left" }}>
        You selected:{" "}
        <span style={{ color: "dodgerblue", fontWeight: "800" }}>
          {selectedPets
            .map((pet, i, arr) =>
              arr.length > 1 && arr.length - 1 === i ? ` and ${pet}.` : pet
            )
            .join(", ") || "Nothing yet"}
        </span>
      </h5>
      <Autocomplete
        multiple
        style={{ width: "40%" }}
        options={pets}
        onChange={(event, newPet) => {
          setSelectedPets(newPet);
        }}
        inputValue={petInputValue}
        onInputChange={(event, newPetInputValue) => {
          setPetInputValue(newPetInputValue);
        }}
        renderInput={(params) => {
          return <TextField label='Select your favourite pets' {...params} />;
        }}
      ></Autocomplete>
    </React.Fragment>
  );
};
The above component will function as follows:
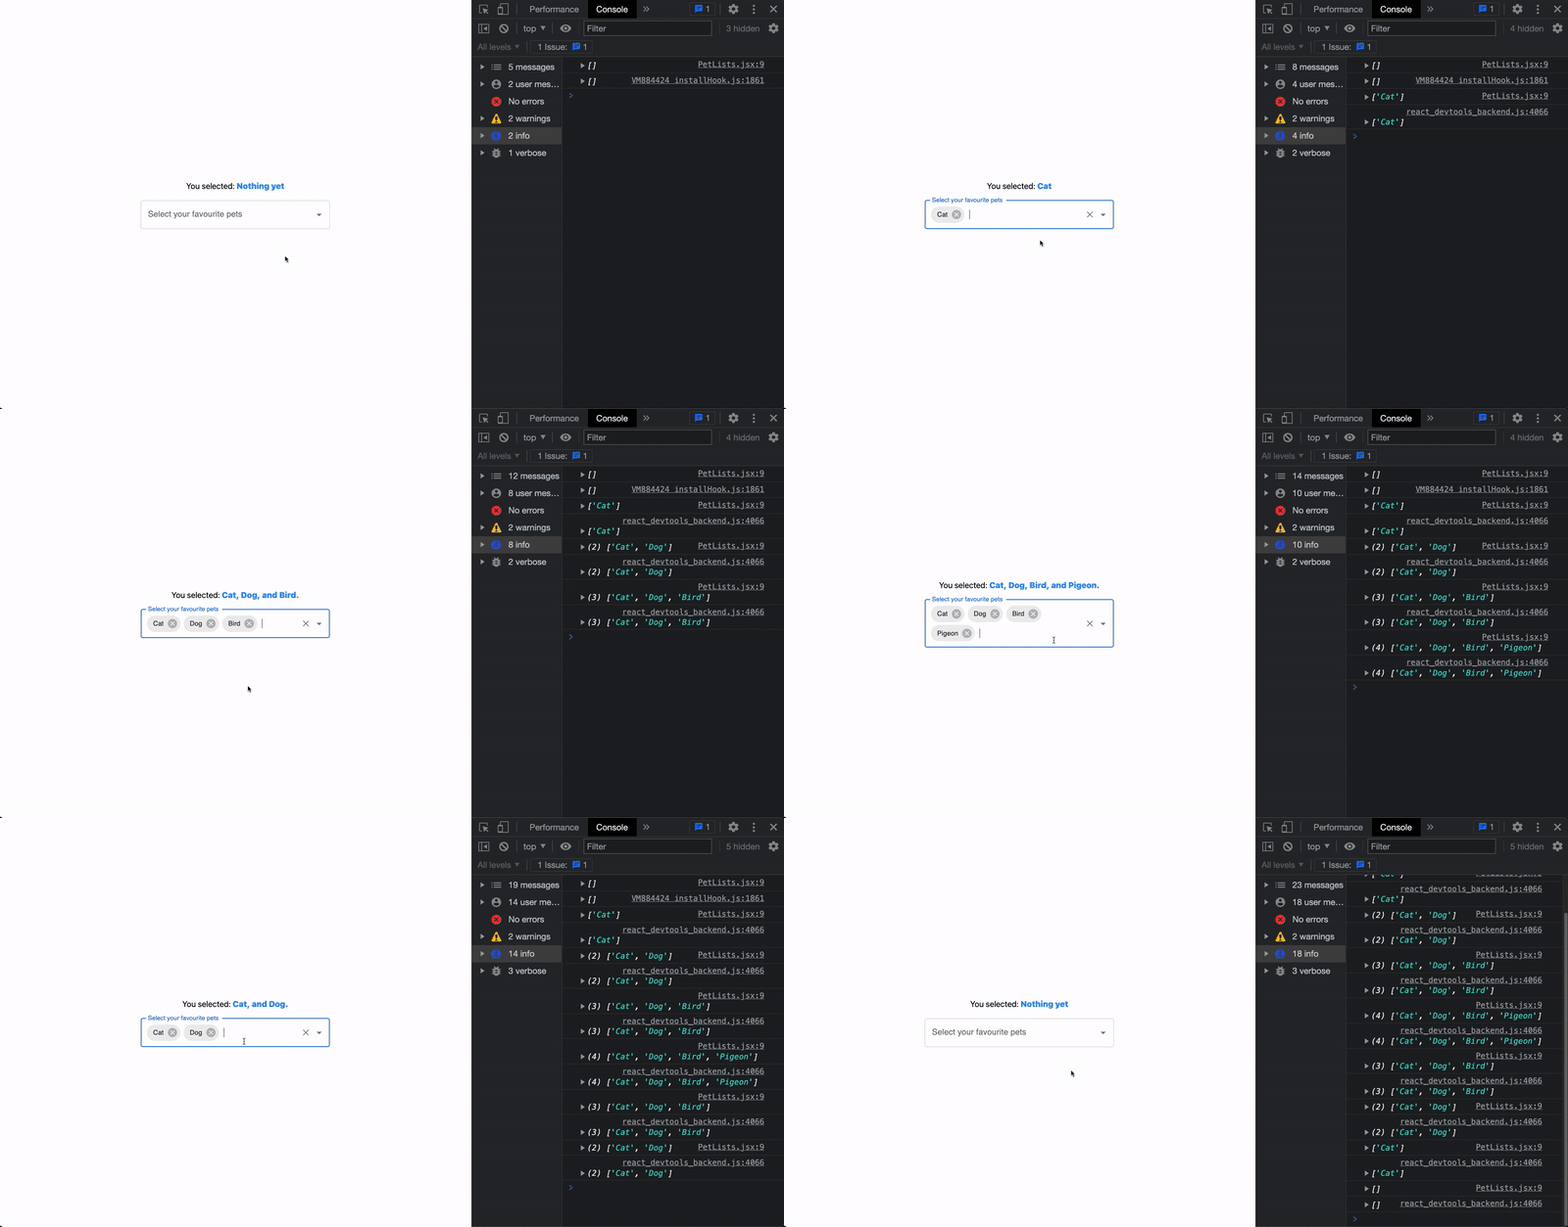
As demonstrated above, the selected options are added to the list within the input and are removable through the close icons.
Setting Default Multiple Selected Values in the Material UI Autocomplete
You can set a default value for the multiple select option in the useState and defaultValue prop in the Autocomplete component as follows:
import { Autocomplete, TextField } from "@mui/material";
import React, { useState } from "react";

export const PetLists = () => {
  const pets = ["Cat", "Dog", "Bird", "Pigeon"];
  const [selectedPets, setSelectedPets] = useState([pets[2], pets[3]]);
  const [petInputValue, setPetInputValue] = useState("");

  console.log(selectedPets);

  return (
    <React.Fragment>
      <h5 style={{ marginBottom: "1rem", textAlign: "left" }}>
        You selected:{" "}
        <span style={{ color: "dodgerblue", fontWeight: "800" }}>
          {selectedPets
            .map((pet, i, arr) =>
              arr.length > 1 && arr.length - 1 === i ? ` and ${pet}.` : pet
            )
            .join(", ") || "Nothing yet"}
        </span>
      </h5>
      <Autocomplete
        multiple
        defaultValue={selectedPets}
        style={{ width: "40%" }}
        options={pets}
        onChange={(event, newPet) => {
          setSelectedPets(newPet);
        }}
        inputValue={petInputValue}
        onInputChange={(event, newPetInputValue) => {
          setPetInputValue(newPetInputValue);
        }}
        renderInput={(params) => {
          return <TextField label='Select your favourite pets' {...params} />;
        }}
      ></Autocomplete>
    </React.Fragment>
  );
};
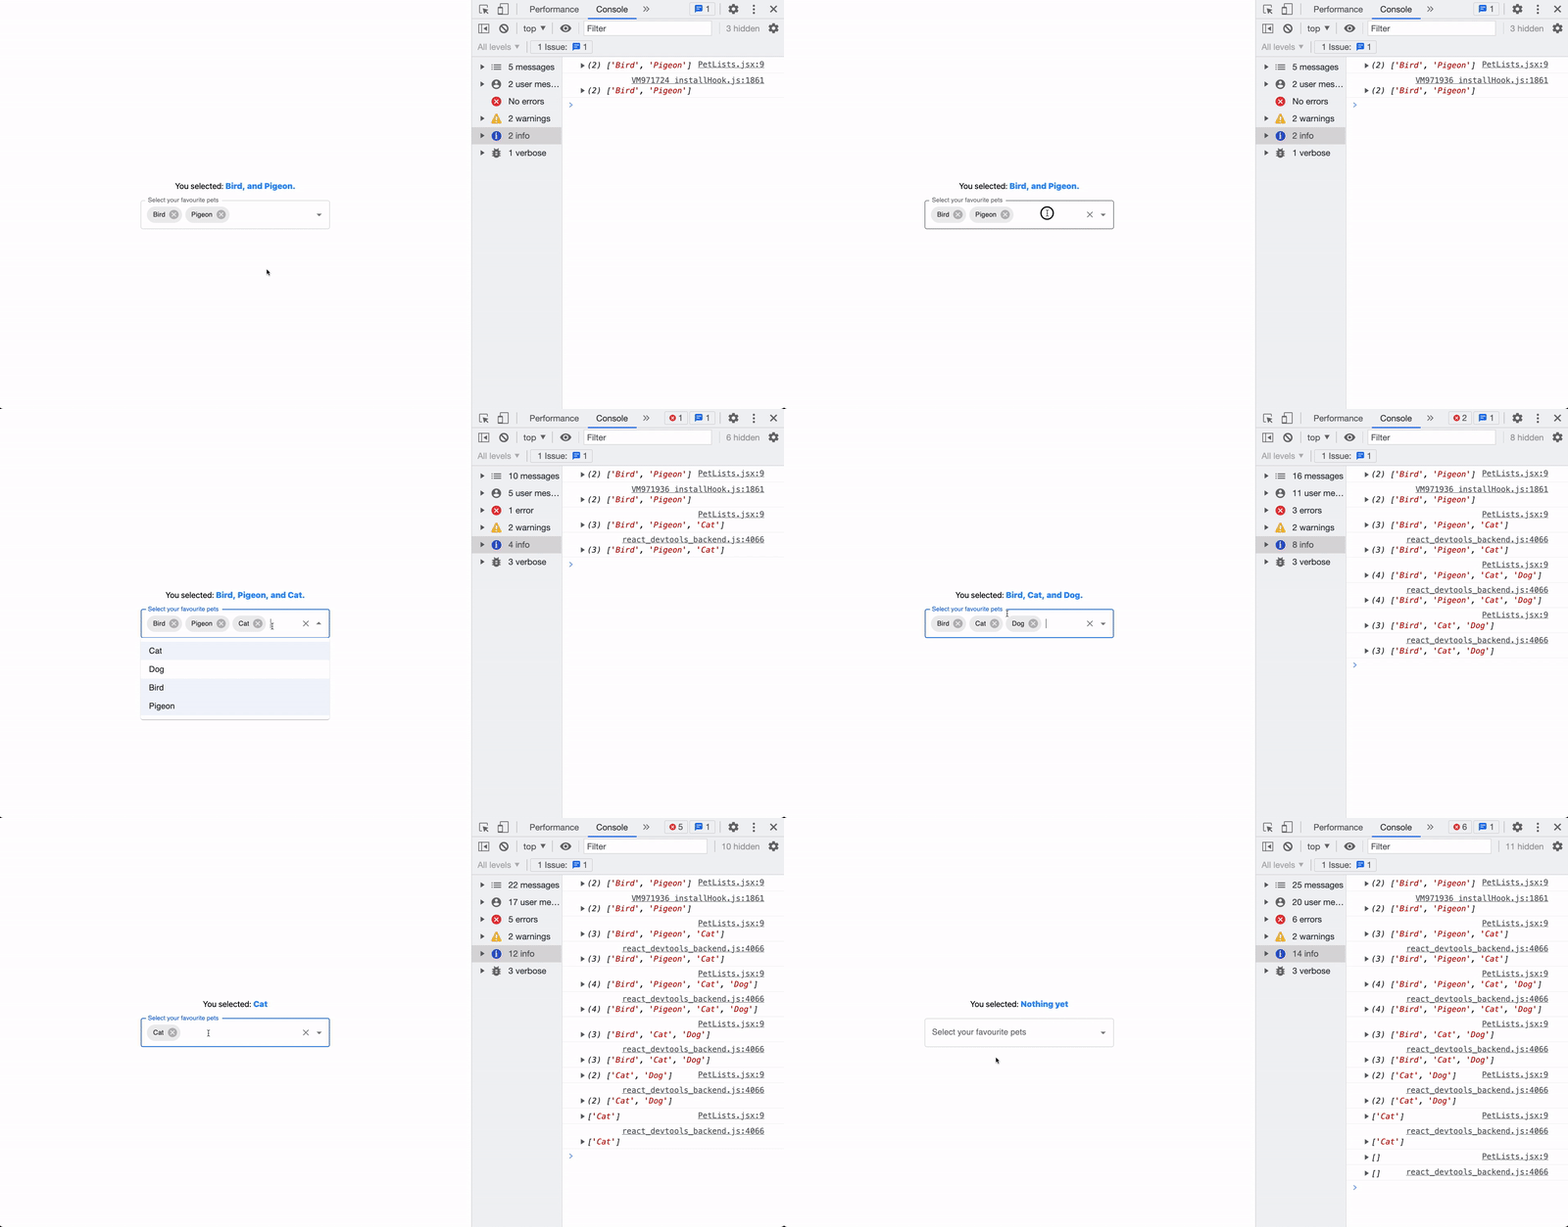
Note that the default value must be an array when using the multiple prop.
Our default multiple selected options rendered shown below:
Rendering Array Of Objects in Material UI Autocomplete Component
Given that you’re to render an array of pets objects with name and img properties as structured below:
const pets = [
  { name: "Cats", img: "🐈" },
  { name: "Dog", img: "🦮" },
  { name: "Bird", img: "🦜" },
];
We’ll make use of the autocomplete getOptionLabel prop to specify the key in the object that we want to render as the option.
Below will be our getOptionLabel given that we want to use the name key as our option:
getOptionLabel={(option) => option.name}
We can also customize the dropdown option label through the renderOption prop as shown below:
renderOption={(props, option) => (
  <Box component='li' {...props}>
    {option.name} {option.img}
  </Box>
)}
This will render the name and image of the pet objects side by side in the dropdown options like this Cat 🐈.
Putting everything together, our component will look like this:
import { Autocomplete, TextField } from "@mui/material";
import { Box } from "@mui/system";
import React, { useState } from "react";

export const PetLists = () => {
  const pets = [
    { name: "Cats", img: "🐈" },
    { name: "Dog", img: "🦮" },
    { name: "Bird", img: "🦜" },
  ];
  const [selectedPet, setSelectedPet] = useState(null);
  const [petInputValue, setPetInputValue] = useState("");

  console.log(selectedPet);

  return (
    <React.Fragment>
      <h5 style={{ marginBottom: "1rem", textAlign: "left" }}>
        You selected:{" "}
        <span style={{ color: "dodgerblue", fontWeight: "800" }}>
          {selectedPet
            ? `${selectedPet?.name} ${selectedPet?.img}`
            : "Nothing yet"}
        </span>
      </h5>
      <Autocomplete
        style={{ width: "40%" }}
        options={pets}
        getOptionLabel={(option) => option.name}
        renderOption={(props, option) => (
          <Box component='li' {...props}>
            {option.name} {option.img}
          </Box>
        )}
        onChange={(event, newPet) => {
          setSelectedPet(newPet);
        }}
        inputValue={petInputValue}
        onInputChange={(event, newPetInputValue) => {
          setPetInputValue(newPetInputValue);
        }}
        renderInput={(params) => {
          return <TextField label='Select your favourite pet' {...params} />;
        }}
      ></Autocomplete>
    </React.Fragment>
  );
};
The above complete component will function as shown below:
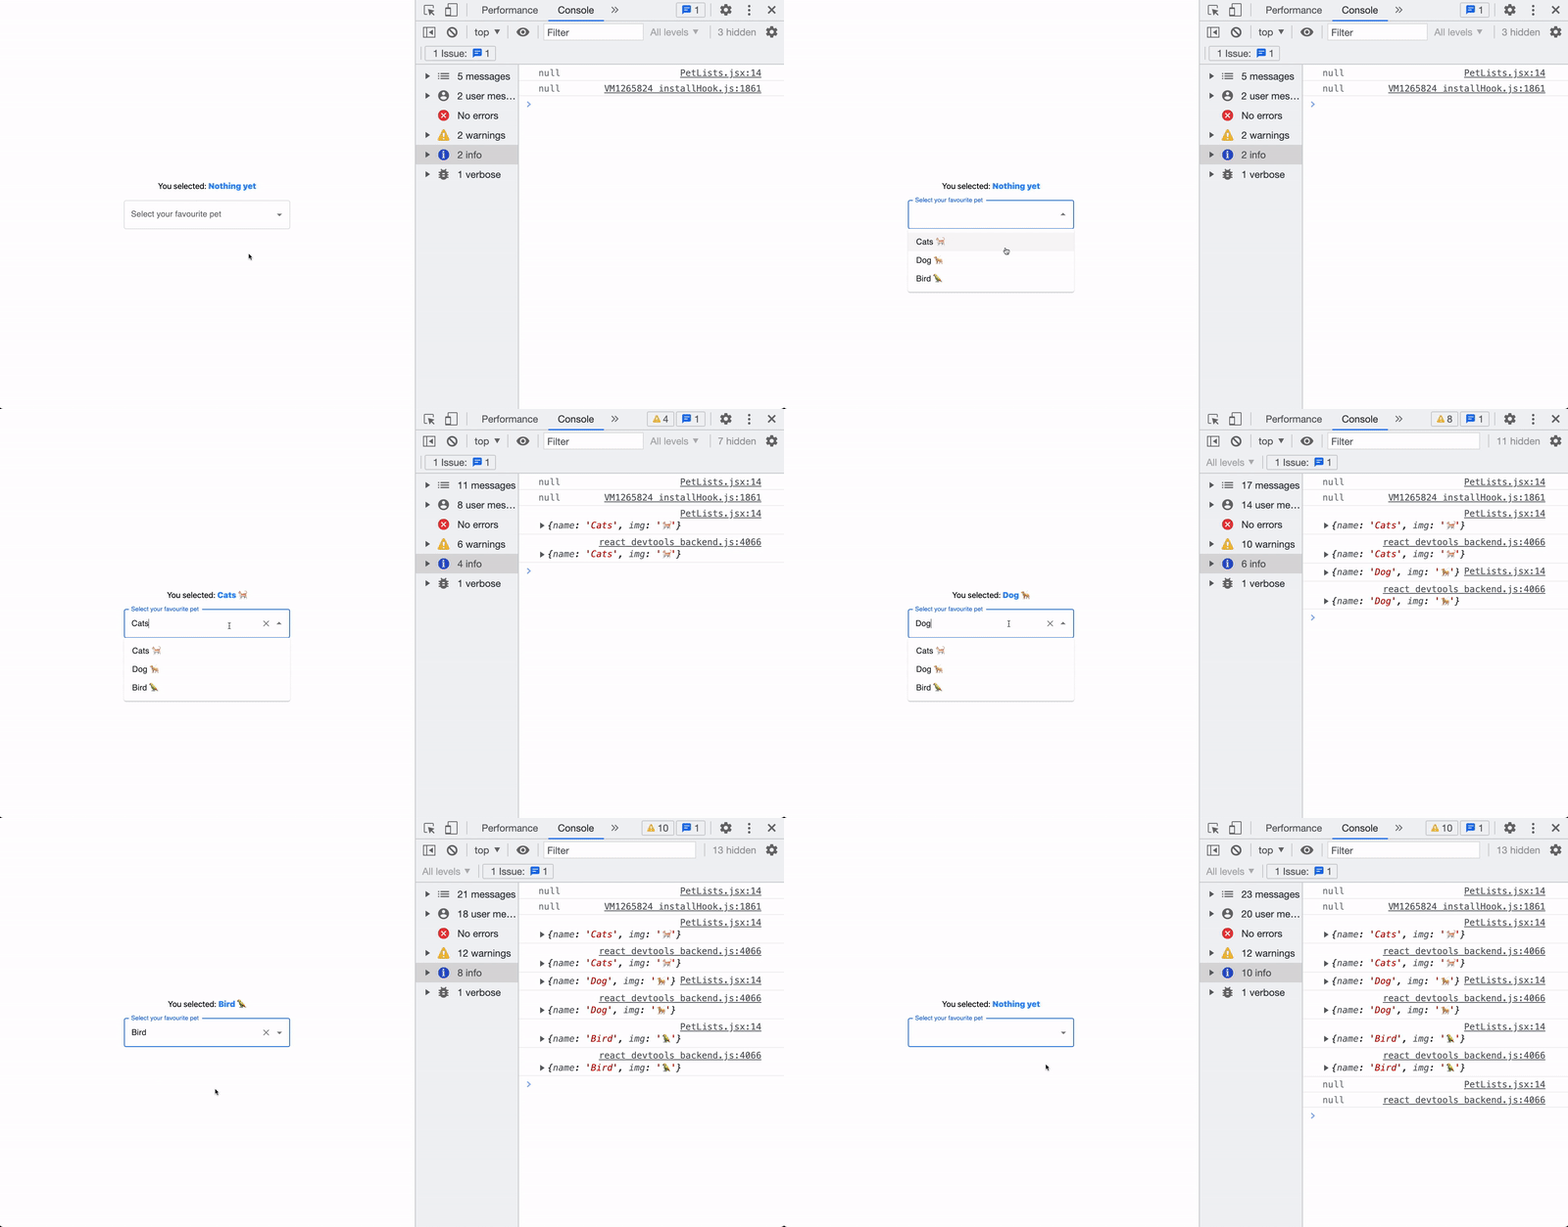
As demonstrated above, the selectedPet will return an object of the selected pet from the dropdown and we render the name and img in the dom and the whole object in the browser’s console.
Wrapping Up
In this article, we discussed how to use the React Material UI Autocomplete to display the possible values in a search component. You’ve also learned how to create an MUI autocomplete component, set its default value, and retrieve the component’s selected values.
We hope you found this article useful in understanding the React Material UI Autocomplete and how to use it in your own applications.
You can also learn how to customize and render asynchronous request data as options in the Material UI Autocomplete component from the video below:
Finally, more articles like this are on our CopyCat blog. CopyCat converts your Figma files into a ready-to-use React project, saving you over 35% of development time. You can check out CopyCat here.
Interesting Reads From Our Blogs
- Creating Tooltips in React with React-Tooltip Library
- A Guide to Understanding Tricky React setState in Simple Terms
- Top 17 VSCode Plugins to Boost Productivity as a Developer
Happy Coding 👨🏽💻

