


- Introduction
- Web Accessibility: Internationalization(i18n) and Localization
- Internalization
- Localization
- Popular React i18n Libraries
- The React-Intl Library: Translations in React
- Getting Started with the React-Intl API
- Understanding the <IntlProvider /> Component
- Adding Translations
- Declaring and Formatting Messages in React-Intl
- Using Formatted Components in our project
- Date-Time Formatting with React-Intl
- Formatting Numbers and Currency in React-Intl
- Switching Locales in React-Intl
- Rendering the locale switcher
- Conclusion
Introduction
In our attempt to build web applications optimized for globalization and accessibility, internationalization or i18n and localization or l10n are very important.
Eliminating user obstacles to localizing or deploying an application globally is the goal of internationalization. The use of Unicode, older character encodings, string concatenation, and other factors can all help with application design such that we can successfully internationalize web applications.
This post discusses the importance of and differences between i18n and l10n in React and provides a detailed tutorial on how to use React-intl to localize your React application.
Web Accessibility: Internationalization(i18n) and Localization
It’s often pretty easy to fall into the assumption that every user speaks English, reads left to right, or uses other “standard” formats of time, temperature, date and even currency. However, in reality, we shut out specific groups of users from accessing our product, whether partially or fully, and this has several implications.
Internalization
According to W3C, internationalization, often referred to as i18n (since there are 18 letters between the letters I and “n”), is defined as the process of;
[making] your content, application, specification, and so on, in a way that ensures it will work well for, or can be easily adapted for, users from any culture, region, or language.
Simply said, it is a strategy, usually employed during the design and development process, for designing a product or service to be as language- and culture-neutral as possible so that consumers of many backgrounds and nations may use it with ease.
It allows for the accommodation of more users by allowing them to interact with our applications in their preferred language.
Localization
Localization, also frequently referred to as “l10n” because there are 10 letters between “l” and “n, is often mistaken or confused for 118n. However, according to Wikipedia, localization is a method of;
adapting your internationalized software and the experience to meet the language, cultural, and other requirements of a specific target market, otherwise known as a locale, by adding resources and translating content.
Simply said, l10n adapts the content and experience for a certain area (or a specific market) by utilizing the infrastructure and flexibility made available by i18n.
After the i18n process has been completed, language experts or translators will often undertake l10n on the user-facing parts of the program or application.
Carrying out l10n at this stage of product development is important primarily because of text expansion and contraction, text orientation etc. For example, Japanese to English translation can expand the text by up to 55%
The term “localization” encompasses more than just translating text languages; it also includes localizing naming conventions, accounting standards, date and time differences, currency, culturally appropriate symbols (pictograms), images, hand gestures, legal requirements, and other locale-specific elements.
Popular React i18n Libraries
While i18n and l10n might appear difficult to implement in web applications, certain libraries are in place to ensure smooth adoption of internalization in React apps. Some of such libraries include;
The React-Intl Library: Translations in React
The React-intl library is one of the internationalization libraries for FormatJS. It’s the most popular React i18n library mostly because of its owner, Yahoo! The react-intl library is the default option or first choice when it comes to React i18n in React apps. With over 4.5k stars on GitHub, it is a lot more well-known than other libraries.
It supports more than 150 languages, and it is packed with several amazing features.
React-intl makes handling common locale settings, such as date and time, currency, and numbers, simple. Additionally, it features comprehensive documentation that adheres to modern standards and, if feasible, makes use of built-in browser translations.
Getting Started with the React-Intl API
The React-intl library is also fairly easy to get started with, as we will demonstrate in the coming sections.
Prerequisites
This article assumes that your device is running the most recent versions of npm and Node.js. Before understanding React i18n, you need also be familiar with HTML, JavaScript, and the fundamentals of npm or yarn.
Setting up your React project
Install create-react-app first by executing the following command on your command line tool or terminal:
npm install -g create-react-app
A faster and easier alternative to setting up a React project is via CopyCat. Copycat creates up-and-running React projects from your Figma files, saving you about 35% of your development time.
Moving on, name your folder and wait for your project to be created. After your project has been created, open your terminal and, depending on what package manager you are using, either run;
npm start
//or
yarn start
Now that our React project is up and running, let’s set up React-intl in our project directory.
Setting up React-intl in your React project
Run the following command in your terminal or CLI to install the react-intl library:
npm i -S react react-intl
Before we proceed to use React-intl, let’s discuss our application workflow.
Folder Structure and Application Workflow
Now that our project is up and running, let’s discuss folder structure and application workflow.
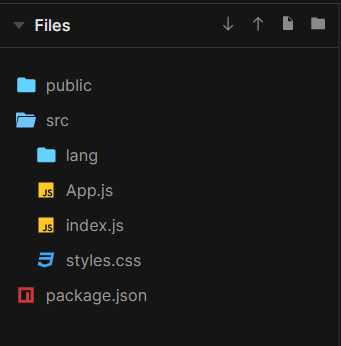
First things first, we want to make sure that we have only the files we need. Therefore, we can go ahead and take out all unnecessary files so that our folder structure looks like this;
For the sake of simplicity, we’ll be working with just two languages; English and French.
One of the key issues frequently encountered while creating our application to enable internationalization is figuring out how to identify the user’s preferred language. In most cases, users have set their browsers to use their preferred language. So, by identifying their language and offering content in that language, we can provide them with an optimal user experience.
All browsers possess the navigator.language object, which may be used to access the user’s language preferences.
So in our top-level file, which in this case is index.js, we can have the following code;
import React from 'react';
import ReactDOM from 'react-dom';
import './index.css';
import App from './App';

import {IntlProvider} from 'react-intl';
import French from './lang/fr.json';
import English from './lang/en.json';

const userLocale = navigator.language;

let lang;
if (userLocale === "en") {
   lang = English;
} else (userLocale === "fr") {
       lang = French;
}

ReactDOM.render(
   <IntlProvider locale ={userLocale} messages={French}>
       <App />
   </IntlProvider>,
   document.getElementById('root')
);
As you can see in the code block above, we have carried out 3 imports: IntlProvider, which we’ll discuss in the following section and two language files: en.json and fr.json, from a lang folder, which we will create soon.
Following that, we then defined a “userLocale” variable to use with navigator.language to navigate language preferences. After that, we instantiated a “lang” variable for our messages and conditionally assigned different languages to the variable based on the specific locale data.
Afterwards, within our render block, we have now wrapped our App with the IntlProvider component and assigned our locale and corresponding messages for each locale as default props to it.
Understanding the <IntlProvider /> Component
The React-intl library uses the provider pattern, in this case, the IntlProvider component, to define a component tree as the scope of the internationalization context. The root component of the program is usually wrapped by this component, and consequently, the entire application is set up under the internationalization context.
We could liken the <IntlProvider /> to React’s <Context.Provider/> component because it functions quite the same, the only difference being, in the context of l10n and i18n, it provides important localization configurations to all the components on our component tree.
It also provides subcomponents of the React-intl library, called “formatted” components, to our application. The components are responsible for the translation and runtime formatting. They include;
- FormattedMessage
- FormattedPlural
- FormattedNumber
- FormattedDate
- FormattedList
- …and several others
All these components format specific forms of content in our application according to the assigned or selected locale data.
Adding Translations
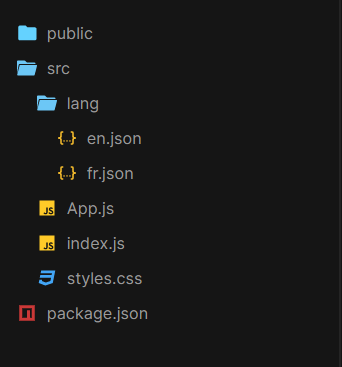
Now to update the language files with the appropriate translated messages. So, if you haven’t already, add three files with the names en.json and fr.json to the ‘lang‘ subfolder in the source folder. Then, add the subsequent information to the files appropriately.
So now our folder structure looks like this;
So within en.json, we have;
{
 "header" : "Welcome to my webpage!" ,
 "content" : "Learn React-int'l with me" ,
 "footer": "Courtesy of CopyCat"
}
…and in fr.json,
{
 "header" : "Bienvenue sur ma page web!" ,
 "content" : "Apprenez React-int'l avec moi" ,
 "footer": "Avec l'aimable autorisation de CopyCat"
}
Declaring and Formatting Messages in React-Intl
At top level, FormatJS adopts the ICU syntax in declaring messages. There are several ways to call the FormatJS API when declaring messages with react-intl. They include;
- intl.formatMessage – an imperative APIThis is one of the API layers upon which React-int’l is built. The function is used as an AST(Abstract Syntax Tree) to extract messages from the codebase and must be called intl.formatMessage() exactly as it is. Any other method of calling the function will not work.
For example;
intl.formatMessage(
   {
       description: 'My introduction',
       defaultMessage: 'Hi, my name is {name}',
   },
   {
       name: CopyCat,
   }
);
The function takes in two objects; the first contains the message description and the defaultMessage, while the other contains relevant values, as shown above. Values should be object literals, but the description and defaultMessage should both be string literals.
- FormattedMessage – ReactAPI
Another way of declaring messages is by using the FormattedMessage component. This component takes in the same set of properties as intl.formatMessage(); description, defaultMessage and values, and an extra id prop.
import {FormattedMessage} from 'react-intl';
<FormattedMessage
   description="My introduction"
   defaultMessage="Hi, my name is {name}"
   values={
       {
           name: CopyCat,
       }
   }
/>;
Also, just like intl.formatMessage(), FormattedMessage must be used just as it is. Any other method will not work.
- Pre-declaring using defineMessage for later consumption (less recommended)
This method involves calling the react-intl defineMessage() function and assigning only the description and defaultMessage props to it for the values to be declared later on.
import {defineMessage} from 'react-intl';
const message = defineMessage({
   description: 'message',
   defaultMessage: 'Welcome {name}',
});

intl.formatMessage(message, {name: 'CopyCat'}); // Welcome CopyCat

<FormattedMessage
   {...message}
   values={{
       name: 'CopyCat',
   }}
/>; // Welcome CopyCat
Using this method to extract messages is least recommended because according to the FormatJS docs,
“you can declare a message without immediately formatting it with defineMessage and our extractor would still be able to extract it. However, our enforce-placeholders linter rule won’t be able to analyze it.”
Using Formatted Components in our project
Let’s make all our changes so far reflect on our project.
We’ll begin by importing FormattedMessage into our App.js file like so;
import {FormattedMessage} from 'react-intl';
Afterwards, we’ll proceed to write our basic JSX structure.
import React from 'react';
import logo from './logo.svg';
import {FormattedMessage} from 'react-intl';

function App() {
 return (
   <div className="App">
     <header className="App-header">
         <FormattedMessage
         id = "header"
         defaultMessage="Welcome to my webpage!"
       />
     </header>
     <main>
        <FormattedMessage
           id = "content"
           defaultMessage="Learn React-int'l with me"
         />
     <main/>
     <footer>
  	FormattedMessage
         id = "footer"
         defaultMessage="Courtesy of CopyCat"
       />
     <footer/>
 </div>
 );
}

export default App;
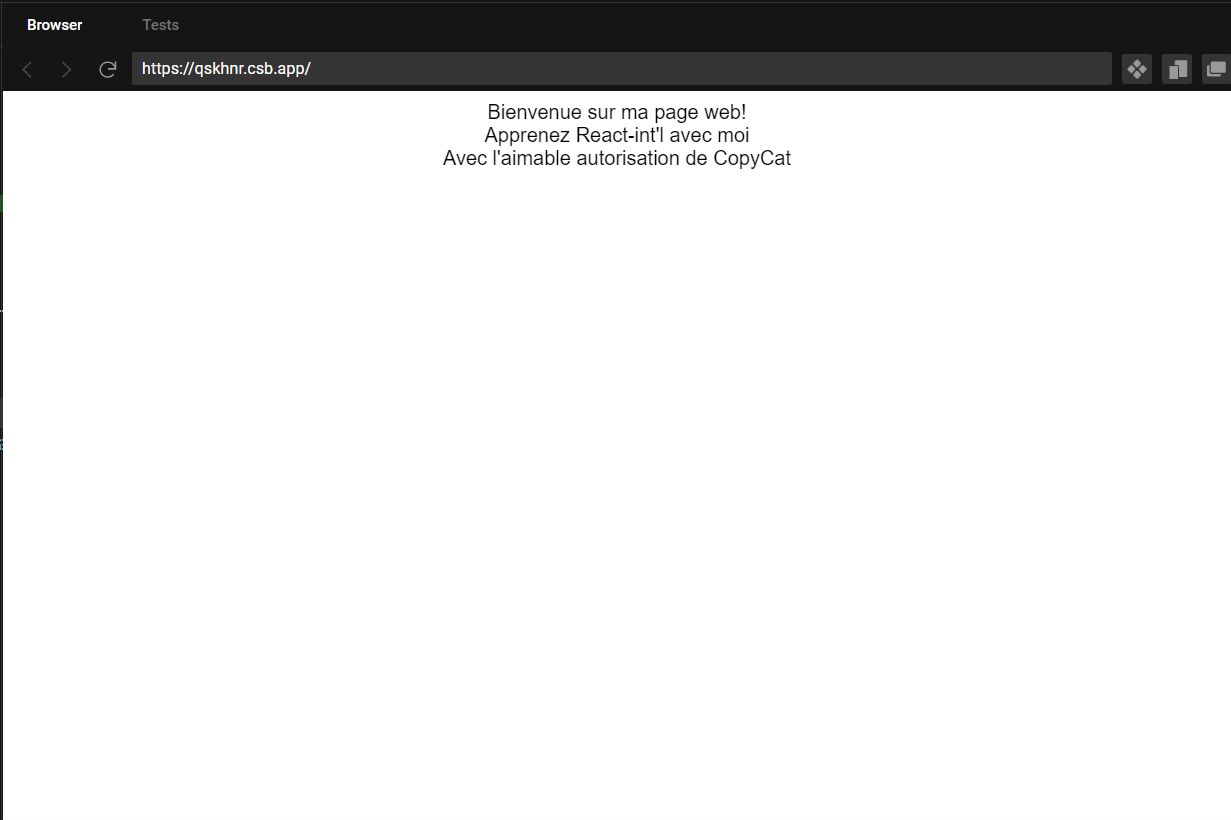
Run “npm start” after making these changes, then open http://localhost:3000/ in your browser.
Your app content should be in French and should look like this without styling;
These changes will take effect automatically if you have previously run the command and the server is up and running.
Date-Time Formatting with React-Intl
Dates and time formats differ across different locales, and we can also use formatted components to format dates and times in React applications.
Date Formatting in React-Intl: FormattedDate
The FormattedDate component handles formatting the date to match the chosen locale. When inputting a date, you should provide the year, month, day, and weekday formats that you like.
<FormattedDate
           value={new Date()}
           year = 'numeric'
           month= 'long'
           day = 'numeric'
           weekday = 'long'
       />
The format “numeric” indicates that you want the year and day as numbers, while the format “long” in the case of the month and weekday indicates that you want the two words printed out in their entirety. Other formats include “short” and “medium”.
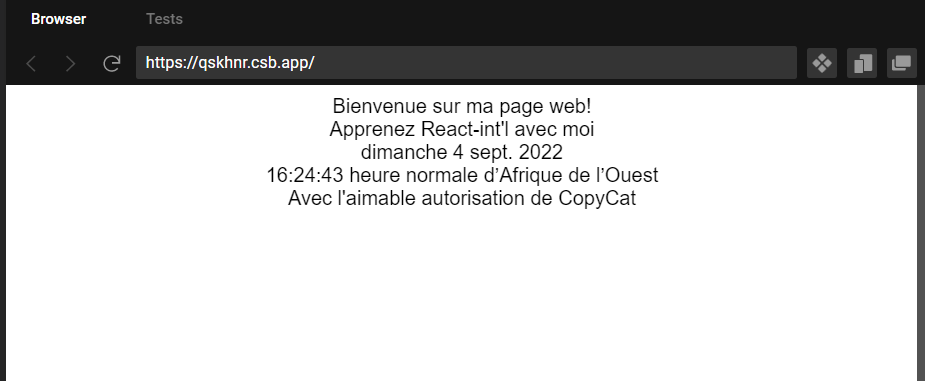
Go back to your browser, and your application should have a date like so;
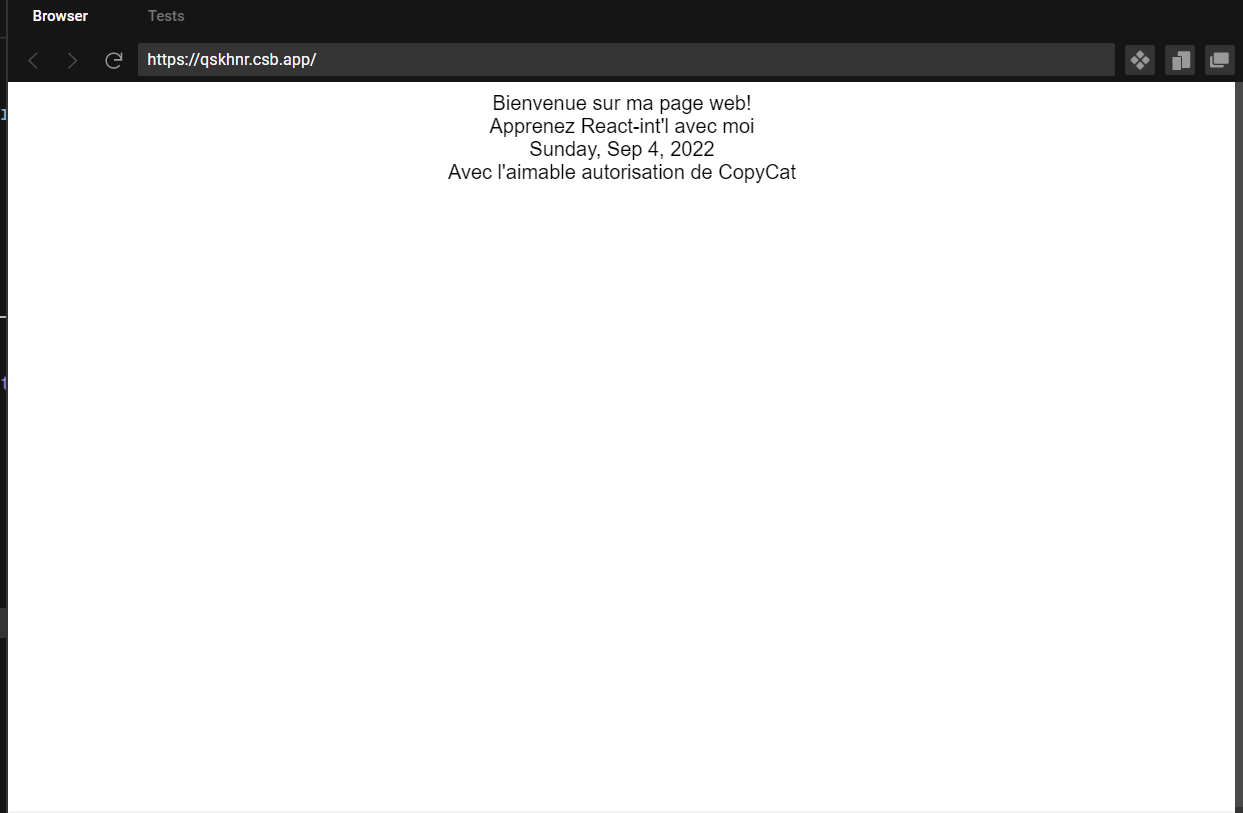
As we can see, our date renders in English.
Why? Because we do not have localized date values like we have our messages. So to see our changes reflect, go on ahead to change your locale data from {userLocale} to “fr” like so.
// from this
   <IntlProvider locale ={userLocale} messages={French}>
       <App />
   </IntlProvider>

// to this
   <IntlProvider locale ="fr" messages={French}>
       <App />
   </IntlProvider>
Now our date should render in French.

Later we’ll learn to dynamically switch between additional languages, but for now, we’ll work with manual changes. Feel free to play around with the values to format your dates how you want to.
Time Formatting in React-Intl: FormattedTime
Like the FormattedDate component, the FormattedTime component has the ability to format local time.
Add the following to your App.js file.
<FormattedTime
   value={new Date()}
   hour="numeric"
   minute="numeric"
   second="numeric"
   timeZoneName="long"
/>
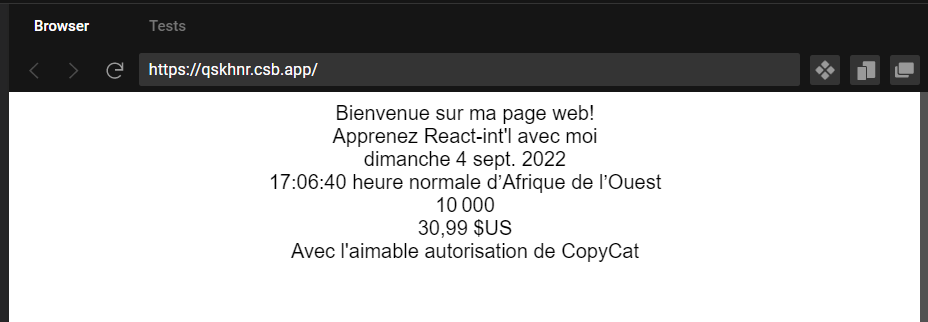
Go back to your browser, and your time should now be displayed.
Just like FormattedDate, values for each of these props can be either short, long, medium or numeric. Feel free to play around with them.
Formatting Numbers and Currency in React-Intl
FormattedNumber
Different countries have different ways of representing numbers and currency. For instance, the USA uses commas to separate thousands into clusters of three and dots to separate decimals. However, in France, a single space is used to accomplish a thousand separations, while the comma is used as a decimal separator.
React-intl offers the FormattedNumber component to format integers and decimals according to the locale.
<FormattedNumber
   value={10000}
/>
Add this to your App.js file and run it, and you should have this.

Another use for FormattedNumber is that it can be used to format currencies as well.
See the example below;
<FormattedNumber
  value={30.99}
  style="currency"
  currencyDisplay="symbol"
  currency="USD"
/>
Add this to your app.js file and run your code. Your page should look like this;
Switching Locales in React-Intl
So far, we have hardcoded our locales and locale data. Now, we want to add some functionality to our app to enable us to switch locales on the fly.
We’ll start by creating another file in our src folder. We’ll call this file, ContextWrapper.js.
Populate the just-created file with the following code;
import React, {useState} from 'react';
import {IntlProvider} from 'react-intl';
import French from '../lang/fr.json';
import English from '../lang/en.json';

const Context = React.createContext();

const userLocale = navigator.language;

let lang;
if (userLocale === 'en') {
   lang = English;
 } else if (userLocale === 'fr') {
       lang = French;
   }
}

const Wrapper = (props) => {
   const [locale, setLocale] = useState(userLocale);
   const [messages, setMessages] = useState(lang);

   function selectLanguage(e) {
       const newLocale = e.target.value;
       setLocale(newLocale);
       if (newLocale === 'en') {
           setMessages(English);
       } else if (newLocale === 'fr'){
               setMessages(French);
           }
   }

   return (
       <Context.Provider value = {{locale, selectLanguage}}>
           <IntlProvider messages={messages} locale={locale}>
               {props.children}
           </IntlProvider>
       </Context.Provider>

   );
}

export default Wrapper;
If you’ve noticed, the above code is quite similar to what we had written in our index.js file at the beginning. Only this time, we have decided to move all that logic from index.js to our ContextWrapper file and make a couple of additions to it.
So, what does the code above do?
We do not always want to hardcode the user’s language into our React app. Whenever necessary, the user should be able to change the location. We are introducing a Wrapper class as a result.
export const Context = React.createContext();
React Context offers a method for passing data down the component tree, eliminating the requirement for manual prop handing down at every level. React.createContext instantiates an object. React will read the context value present in the closest matching Provider directly above it when displaying a component that subscribes to this object in this case.
const Wrapper = (props) => {
   const [locale, setLocale] = useState(userLocale);
   const [messages, setMessages] = useState(lang);

   function selectLanguage(e) {
       const newLocale = e.target.value;
       setLocale(newLocale);
       if (newLocale === 'en') {
           setMessages(English);
       } else {
           if (newLocale === 'fr'){
               setMessages(French);
           } else {
               setMessages(Arabic);
           }
       }
   }
We’ve also created two states, one to handle the current language and another to handle the messages.
The function, selectLanguage, handles switching between languages. It checks the value of the newLocale variable to set the language and has a straightforward if/else method. When your program just supports a few different languages, this if/else approach is workable. It is not efficient when there are many languages, and you might need to opt for a switch case instead.
	<Context.Provider value = {{locale, selectLanguage}}>
           <IntlProvider messages={messages} locale={locale}>
               {props.children}
           </IntlProvider>
       </Context.Provider>
The Context Object returns Provider and Consumer components. The Provider component makes it possible for utilizing components to subscribe to any context changes. We’ve assigned locale and selectLanguage function as values to our Provider because we want the entirety of our app to be able to access it.
Now, that we’re done, we can head on over to our index.js file and wrap our App component with our Wrapper component like so;
import React from 'react';
import ReactDOM from 'react-dom';
import App from './App';
import {IntlProvider} from 'react-intl';
import Wrapper from "./components/Wrapper";

ReactDOM.render(
   <Wrapper>
       <App />
   </Wrapper>,
   document.getElementById('root')
);
Now that our context is set up, we can now use it in our app.
Rendering the locale switcher
To use the context in our app, we need to do two things;
- Import our context from ContextWrapper.js into our App.js file,
import {Context} from "./components/Wrapper"; - Import the useContext hook into our App.js file
import React, {useContext} from 'react'; - and finally, access our context by assigning it to a variable like so;
const context = useContext(Context);
After that is done, we can now render our local switcher like so;
       <select value = {context.locale} onChange={context.selectLanguage}>
         <option value= 'en'>English</option>
         <option value= 'fr'>French</option>
       </select>
Now, when we go back to our browser, our app should be able to switch between locales.

Check out the full code and live demo for this project here.
To learn more about React Context, check out this quick video;
Conclusion
Like any other React i18n library, this widely-known library has certain drawbacks as well. One of them is that react-intl cannot be used with non-react components. It needs the top-level component to provide children components with some context. As a workaround to this, some people are turning to the react-intl-universal library as a react-intl alternative for non-react applications.
To learn more about formatted components in React-intl, check out the FormatJS docs here or this cool video on react-intl:
At CopyCat, we have a catalog of useful articles for React developers, just like this one. Check them out here.
Related Articles
-
 React.js
Setting up Tailwind CSS in React Application: Walk-through and Examples
Introduction In software engineering, there is no need for you to reinvent the wheel, instead, it is better to use libraries and frameworks to put together your application when possible tweaking it to fit your need, thereby saving you time, and…
October 1, 2022 -
React.js
What to Read When Using React Typescript In Your App
Introduction These days, businesses are migrating their applications and digital product from plain ol' Javascript to Typescript. Why? Well, we could liken Typescript to Javascript with superpowers. How? We'll find out as we progress. Before we go into details, check…
October 1, 2022