Introduction
Drag and Drop refers to the software’s ability to trigger a callback when one component is dragged over another. It’s an interaction that enables someone to click on something, drag it to another location, and dump it there, often with unintended consequences for the app.
This impact is rather typical when you need to prioritize tasks and establish an order for how they should be completed, such as in project management dashboards or to-do lists. In this article, we would be looking at the basic functionality of drag and drop even if it can be used for more complex cases.
Before we dive into this article proper, have you thought about speeding up the process through which you implement Figma designs? especially when a deadline is approaching. I am able to accomplish that because of the CopyCat plugin. You may swiftly transform Figma designs into React components with CopyCat. Check it out here now.
Prerequisites:
The reader should have;
- Basic knowledge of ES6 JavaScript
- Basic knowledge of React.js.
What is React beautiful DND?
For creating drag-and-drop interfaces in React, there is a package called React Beautiful Dnd (Drag and Drop). In addition to supporting free dragging, sorting inside a list, moving things across lists, animations, touch devices, configurable drag handles, and many other features, it offers a robust, user-friendly solution for building drag-and-drop interfaces.
The fact that React Beautiful Dnd is based on the well-known React JavaScript framework makes it simple to connect with other React components and apps, which is one of the main advantages of utilizing it. This implies that developers may rapidly and easily design complicated drag-and-drop interfaces with little effort by using their existing understanding of React.
Because of the library’s high degree of adaptability, developers may customize the drag-and-drop functionality to suit their own requirements. This contains tools for providing unique styles and animations, putting limitations on how things may be moved, and creating unique drag handles.
React Beautiful Dnd’s functionality for sorting within a list is one of its standout features. By dragging and dropping things into the correct location, users may quickly reorganize the items in a list. Making a playlist of tunes or arranging tasks on a to-do list might benefit from doing this.
Overall, React Beautiful Dnd is a strong and straightforward toolkit for creating drag-and-drop user interfaces. For developers trying to design simple and interesting user interfaces, it is a useful tool since it supports free dragging, sorting inside a list, moving objects across lists, and other complex capabilities.
Installing React Beautiful DND
Before making draggable elements or having a smooth drag-and-drop experience, the React Beautiful Dnd must be installed into your react app. Also, it is important to note that you must have installed the react app using the create react app command and have a react app running before installing React beautiful Dnd. However, you can check the guide for installing a React app in the react official documentation.
Use the npm package manager to install React Beautiful Dnd. Initially, confirm that npm is installed on your system with the most recent version. Then, start a terminal or command prompt and go to the location where you wish to install the library.
Run the following command to install React Beautiful Dnd after you are in the proper directory:
npm install react-beautiful-dnd --save
# or
yarn add react-beautiful-dnd
This will download the library and any other necessary dependencies, and then install them. You can import the library into your React application and begin using it to build drag-and-drop interfaces as soon as the installation is complete.
How to make Droppable and Draggable Items using React Beautiful dnd
In this section, we would be looking at the steps involved in making a draggable and droppable interface in react. With these steps and guides making a drag-and-drop feature in your react application would be an easy task.
But first, in the part that follows, let’s examine how to include the drag-and-drop context into our application.
How to import and implement the dragdropcontext
After installing the React-Dnd package, follow these steps to import the DragDropContext component into your React app:
import { DragDropContext } from 'react-dnd';
You must encase your functional component in the DragDropContext in order to use it. As a result, the DragDropContext may control the drag-and-drop state of the components that are a part of it.
Here is the code illustration of how you may use the DragDropContext to wrap your functional component:
import React from 'react';
import { DragDropContext} from "react-beautiful-dnd"
function App() {
  return (
    <div className="App">
      <h1>React beautiful Dnd</h1>

      <DragDropContext
        onDragEnd={() => { }}
        onDragStart={() => { }}
      >

      </DragDropContext>
    </div>
  );
}

export default App;
In the above code illustration, the dragdropcontext is imported into the react component and then it is implemented in the return statement with 2 props passed to it, the onDragEnd and the onDragStart prop. These props are callbacks used for different events. However, the onDragEnd is the only required prop to be added on default whenever the dragdropcontext tag is used. With this setup the interface to perform drag-and-drop events is ready.
Making A Droppable Area with the React Beautiful DND
Creating a droppable area means specifying the environments where the items can be draggable. In achieving the Droppable component provided by the React Beautiful Dnd would need to be imported and then used in our react component.
However, the code illustration below shows how to import Droppable and implement it:
import React from 'react';
import { DragDropContext, Droppable} from "react-beautiful-dnd"
import './App.css';
function App() {
return (
<div className="App">
<h1>React beautiful Dnd</h1>
<DragDropContext
onDragEnd={() => { }}
onDragStart={() => { }}
>
<Droppable droppableId="droppable-1">
{(provided) => (
<div
className='flex-center'
ref={provided.innerRef}
{...provided.droppableProps}
>
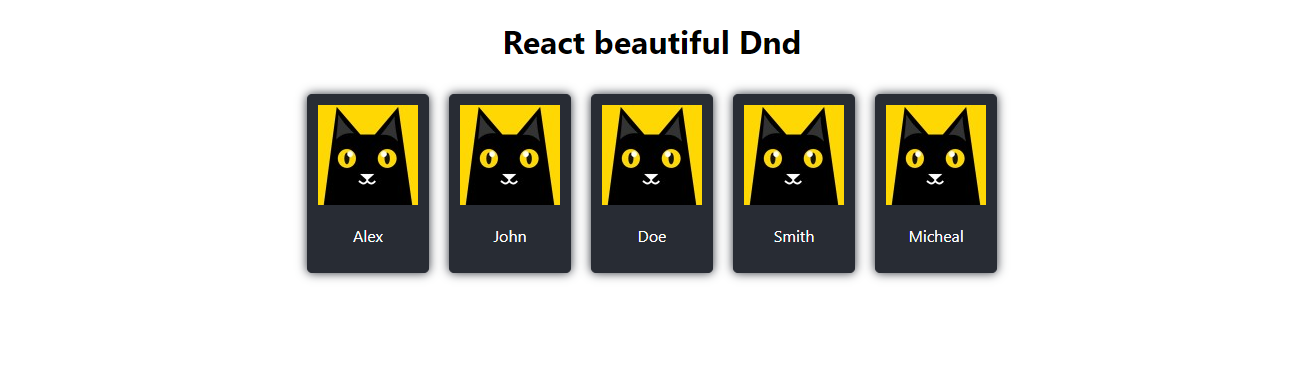
{namesData.map((item, index) => (
<div className='items' key={item.id}>
<p>{item.name}</p>
<img src={url} alt="react" />
</div>
))}
{provided.placeholder}
</div>
)}
</Droppable>
</DragDropContext>
</div>
);
}
export default App;
In the above code illustration, the droppable was imported and wrapped inside of the DragDropContext tag, this way the div with the className flex-center has been made the drop zone. Also, a droppableId was set on the <Droppable> component with this React Beautiful DnD keeps track of each instance between interactions. Also, we have used the provided object to get the innerRef and the droppableProps in order to keep track of movements and positioning. And we have used the provided .placeholder to render the placeholder.
It is important to note that after this implementation there would be no actual drag-and-drop events yet. Which would lead us to the next section below.
Implementing the Drag and Drop functionality
This section talks about the most interesting part of this implementation, where the magic will happen. Before we look into dragging at all, the Draggable component would also need to be imported first from React Beautiful Dnd and then each div item mapped out from the provided array would be wrapped with the Droppable component which will include a function where we’ll pass through props to divs.
See the code illustration of the above theory below;
import React from 'react';
import { DragDropContext, Droppable, Draggable } from "react-beautiful-dnd"
import './App.css';
function App() {
  return (
    <div className="App">
      <h1>React beautiful Dnd</h1>

      <DragDropContext
        onDragEnd={() => { }}
        onDragStart={() => { }}
      >
        <Droppable droppableId="droppable-1">
          {(provided) => (
            <div
              className='flex-center'
              ref={provided.innerRef}
              {...provided.droppableProps}
            >
              {namesData.map((item, index) => {
                return (
                  <Draggable key={item?.id} draggableId={item?.id.toString()} index={index}>
                    {(provided) => (
                      <div
                        className='items'
                        ref={provided.innerRef}
                        {...provided.draggableProps}
                        {...provided.dragHandleProps}
                      >
                        <img src={item.imageUrl
                        } alt="img" />
                        <p>{item.name}</p>
                      </div>
                    )}
                  </Draggable>
                )

              })}

              {provided.placeholder}
            </div>
          )}
        </Droppable>

      </DragDropContext>
    </div>
  );
}

export default App;
We have wrapped the div element in the code above using the Droppable method. Also, the div element has been wrapped using the Draggable method. Additionally, the App component was wrapped using the DragDropContext method.
The draggable element’s id has been specified in the Draggable component using the key and draggableId properties. Additionally, we set the index of the draggable element using the index prop. And to put the ref, draggableProps, and dragHandleProps props, we made use of the provided props.
After this implementation and a refresh, you would see that each of the looped items is now draggable and droppable. But after performing these actions you would notice that the items do not stay where they are dropped. This is because there is no instruction for it to do so. However, we would be looking at this in the following section.
How to Save the Location of items after being Dropped?
If you remember in one of our above sections, we made mention of an onDragEnd callback prop. This callback would be used to update our state when dragging items.
I guess you are already wondering and having questions like;
What state is to be updated?
When did we talk about the state?
But no worries read along to get the gist. In order to save the location of items after they have been dragged and dropped we would need to store our items in a state so that we’ll have something to update between cycles. And in doing this we would be making use of and importing the react useState hook.
See the code illustration below;
import React, { useState } from 'react';
After this, we would go ahead to initialize our state and set the namesData (from which we are looping out data) to it using the following lines of code below;
const [storedItems, setStoredItems] = useState(namesData)
Please note that, you can use whatever your initial array is and set it to the state, it is not compulsory it has to be
namesData
Afterwards, we would need to map through storedItems and not our initial array (namesData) because the stored items would constantly get updated, which is what we would leverage to achieve our goal. After making the required changes our previous implementation would be updated as seen in the code illustration below:
 {storedItems.map((item, index) => {
                return (
                  <Draggable key={item?.id} draggableId={item?.id.toString()} index={index}>
                    {(provided) => (
                      <div
                        className='items'
                        ref={provided.innerRef}
                        {...provided.draggableProps}
                        {...provided.dragHandleProps}
                      >
                        <img src={item.imageUrl
                        } alt="img" />
                        <p>{item.name}</p>
                      </div>
                    )}
                  </Draggable>
                )

              })}
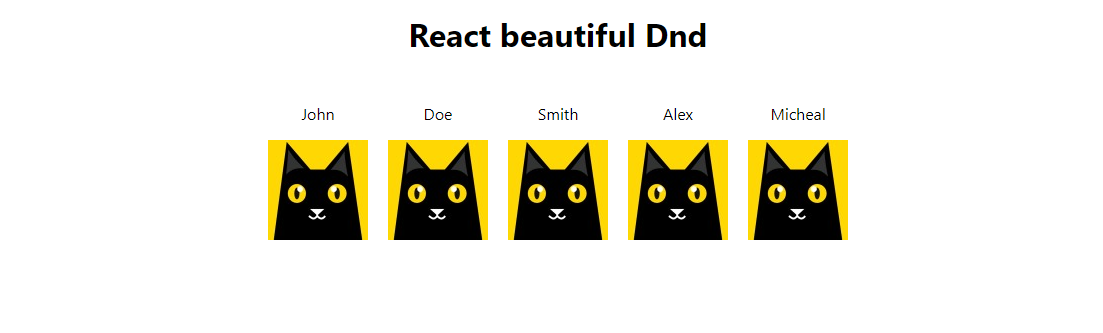
Updating storedItems
Now that we have our rendered array stored in a state, the next step is updating the storedItems state whenever the items are dragged. As mentioned earlier we would now be implementing the onDragEnd callback prop which will trigger a function that will be passed to the onDragEnd prop whenever items are dropped or are no longer dragged.
See the code illustration below:
function handleOnDragEnd(result: any) {
    const items = Array.from(storedItems);
    const [reorderedItem] = items.splice(result.source.index, 1);
    items.splice(result.destination.index, 0, reorderedItem);
    setStoredItems(items);
}
In the above code, we have created a function named handleOnDragEnd which will be called when the user will drag and drop the items. In this function, we have created a new array named items and we have used the Array.from() method to copy the storedItems array into the items array.
Then we created a new array named reorderedItem and we used the splice() method to remove the item from the items array. Then we used the splice() method to add the reorderedItem into the items array. And finally, we have used the setStoredItems() method to update the storedItems array.
After implementing this we would then pass the handleOnDragEnd function to the onDragEnd prop. See the example below;
<DragDropContext
        onDragEnd={handleOnDragEnd}
 ....
And boom we have our items’ location stored after being dragged and dropped.
However, you can check out the live demo and implementation source code to experience or test around and have more understanding.
React drag-and-drop libraries
In this article, we have focused majorly on the react Beautiful dnd library in making drag-and-drop interfaces, but however, the react community has many other varieties of libraries that you can use in implementing a drag-and-drop feature in your react js app. We would be mentioning some of these libraries below;
- React DND
- React Drag and Drop Container
- React Draggable
React DND
Drag and drop interfaces may be created in React apps using the React Dnd (Drag and drop) library. It has an intuitive interface and offers a powerful API for adding drag-and-drop capabilities to your React components.
To enable users to transfer data across various components of your application, React Dnd lets you define draggable elements, drop targets, and drag handles. React Dnd may be used to create a variety of interactive interfaces, such as kanban boards, file browsers, and more.
Check out the official documentation to learn more.
React Drag and Drop Container
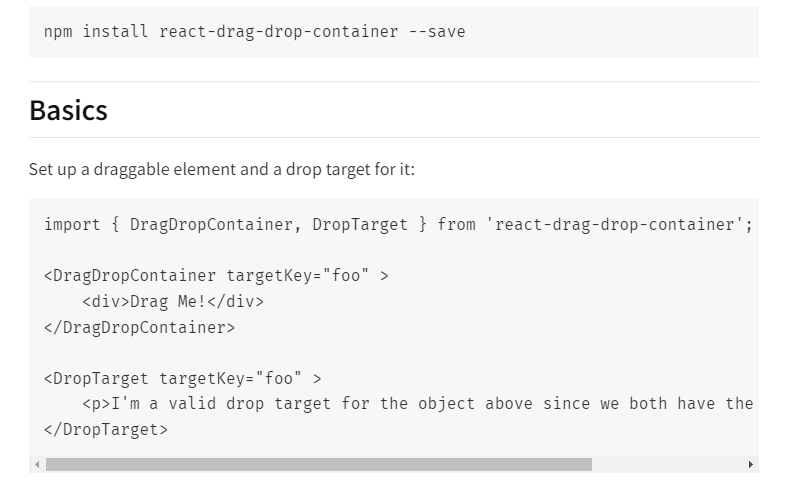
React-Drag-and-Drop-Container is an npm library that makes it simple to add drag-and-drop capabilities to your React apps. It includes a collection of components for creating draggable and droppable items, as well as methods for managing drag-and-drop events.
You can however check out the documentation to understand more about how it works.
React Draggable
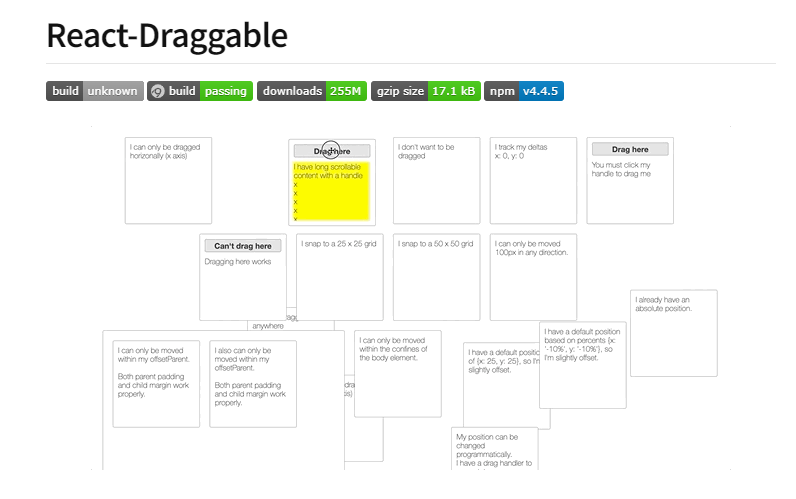
React-draggable is an npm library that adds the drag-and-drop capability to your React components. It includes a Draggable component wrapped around any element to make it draggable, as well as methods to handle drag and drop events.
More details and information about this are available in their documentation. You may want to check it out.
Conclusion
Congratulations on getting here, at this point it is certain that building and making a drag-and-drop feature in your react application would be an easy one for you as we have spoken on different npm Libraries for building a drag-and-drop feature, and not only that we majored and discussed in depth on how to implement a drag and feature in your react application using the react Beautiful Dnd npm library
However, if you have any questions or doubts please drop them in the comment section below. Cheers!! and happy coding!!
Last but not the least, do you that know that you can create UI more quickly with CopyCat? To generate boilerplate code for your Figma designs, all you need to do is provide the link to your Figma design.
If you are looking for more intriguing articles from our blog, click here now.
Interesting articles from our blog.
- React Datepicker Complete Guide With Examples.
- Utilize React to the Max With The Top 15 React Component Libraries.
- How to Build a Good React Modal.
- How to Virtually Render Large Lists Using React Virtualized.
If you would also love to learn deeper about React Beautiful DnD, you can check out the video resource below;
Related Articles
-
 React.js
Complete Guide to React Lazy Loading and Code Splitting
What is lazy loading in React? Lazy loading in React is an optimization technique for websites or web applications. It is also known as on-demand loading because it only loads content visible on users' screens. What does optimization mean? Web…
June 9, 2022 -
React.js
Getting Started with React Select: A Comprehensive Guide
Introduction to React Select In regular HTML, you have the select tag that allows you to create a dropdown list or a menu of options. In modern web applications or websites today, using the regular HTML select element itself puts…
December 24, 2022